Build an AI Chat Web App With 100% Python - Open-Source Model
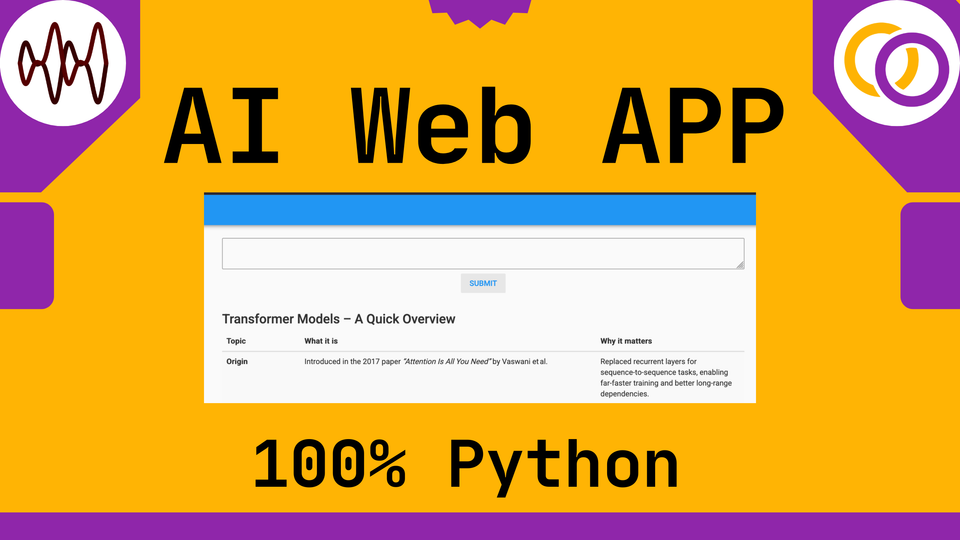
This tutorial explains how to create a web app that deploys an open‑source AI model using only Python, even if you have no web‑development experience. I created a full course on this topic in 2021, and this updated guide covers how to use the latest tools to build an AI web app with just Python.
Building a chatbot web‑app using only Python is possible with the following technologies:
- Eric Transformer – a new Python package I maintain that abstracts pre‑training, fine‑tuning, RAG, and inference with transformer models.
- Runpod – an easy‑to‑use, cost‑effective GPU service.
- Anvil – provides a drag‑and‑drop interface for creating a UI and lets you write both front‑end and back‑end logic with pure Python directly in their web interface.
- gpt-oss-2ob - OpenAI released an 20-billion-parameter open-source chat model that's available on Hugging Face.
But why Python? Keeping your entire tech stack in Python is very convenient, especially for prototyping. Python is the primary language for data scientists, so maintaining a Python‑only stack lets them work in the language they are most comfortable with. Anvil offers many features beyond being Python‑based, making it a great choice for web developers – even if they already know JavaScript.
Create a Runpod Account
I've been using and recommending Runpod for many years. I'm happy to share the following affiliate link which provides you with a one-time credit between $5 to $500 when you sign up and add $10 to your account.
https://runpod.io?ref=rh7fgnfm
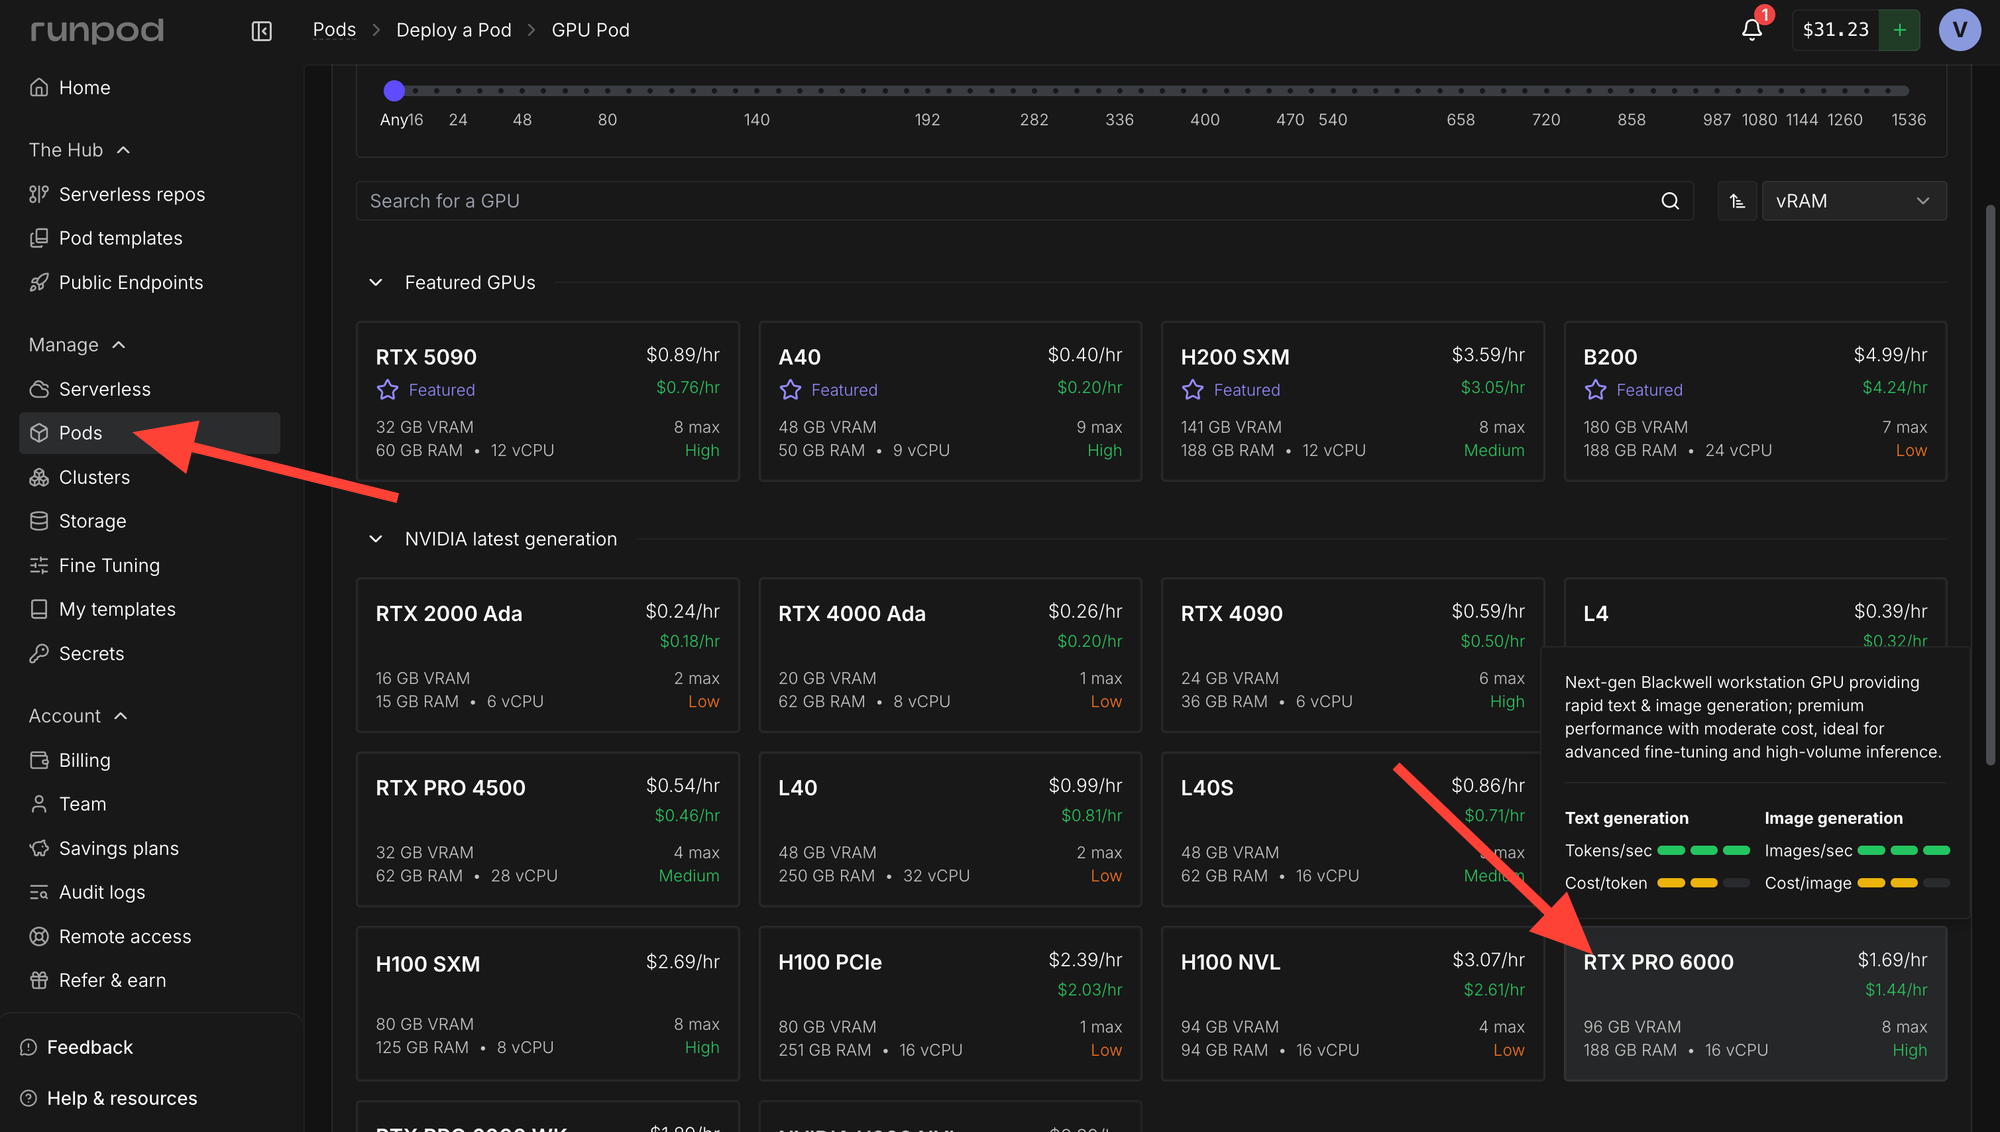
Launch a GPU
Head over to the Pods section and rent a RTX Pro 6000 or better. An H200 SMX would also work great.
Click "Change Template"
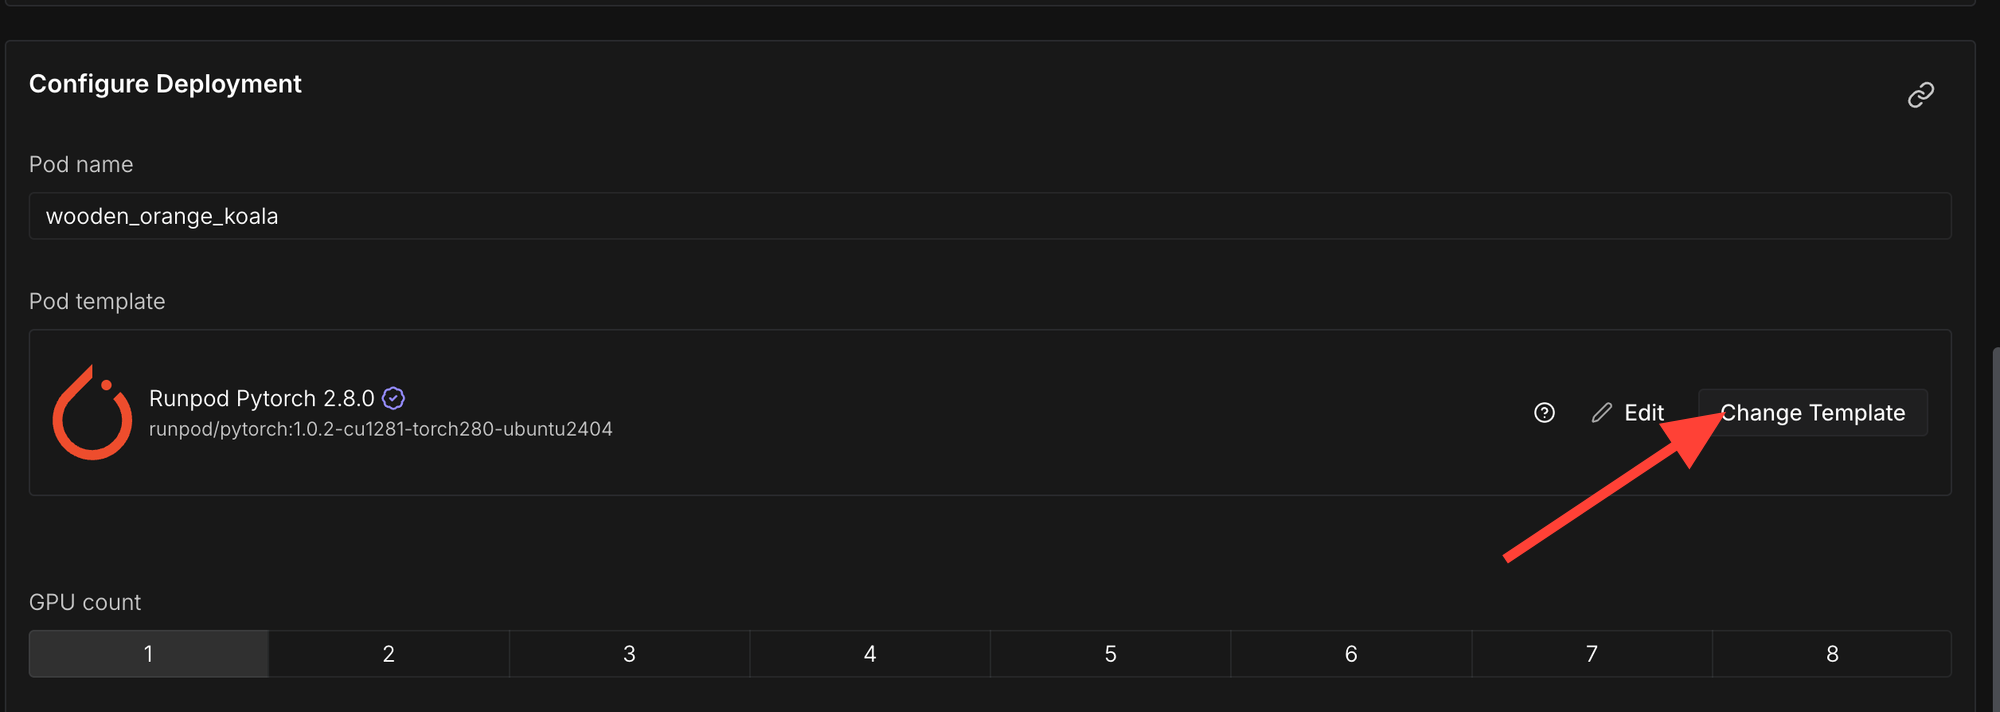
Select "Runpod Pytorch 2.8.0".

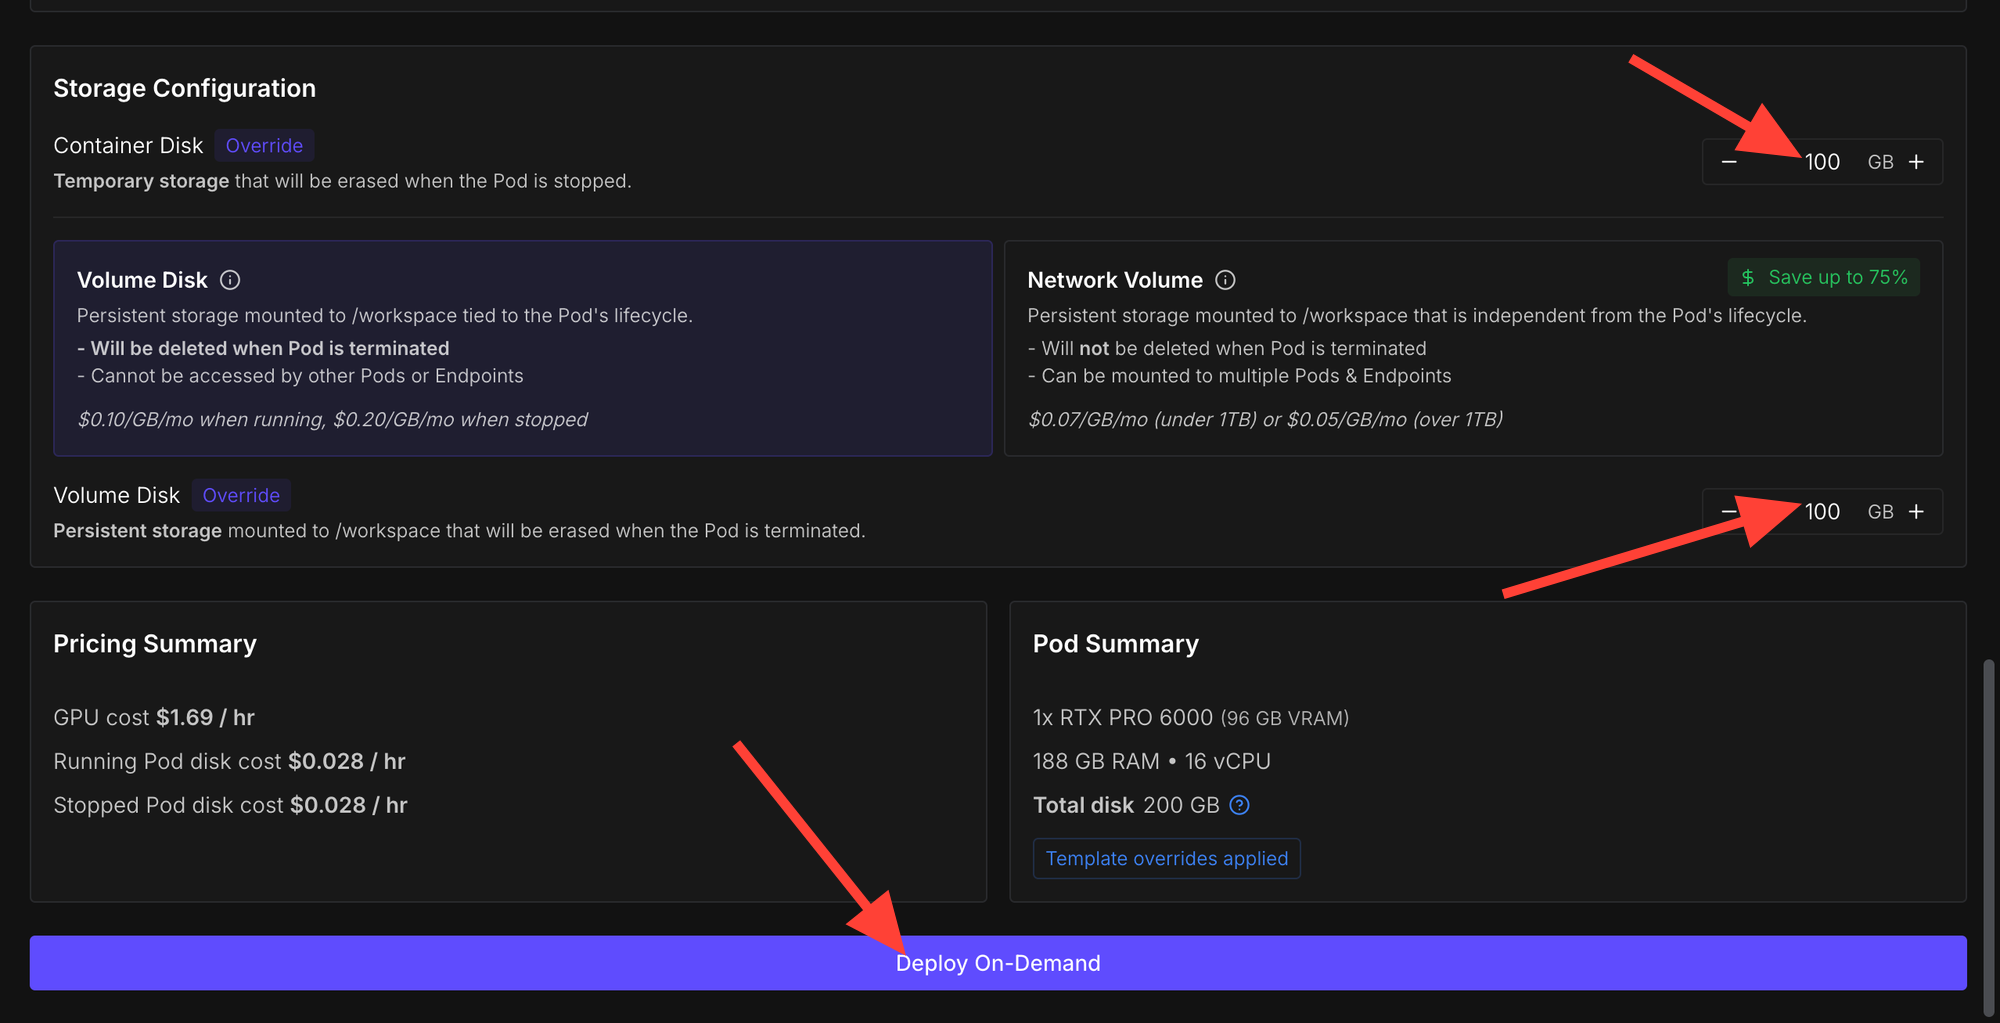
Increase the amount of storage and then click "Deploy On-Demand".
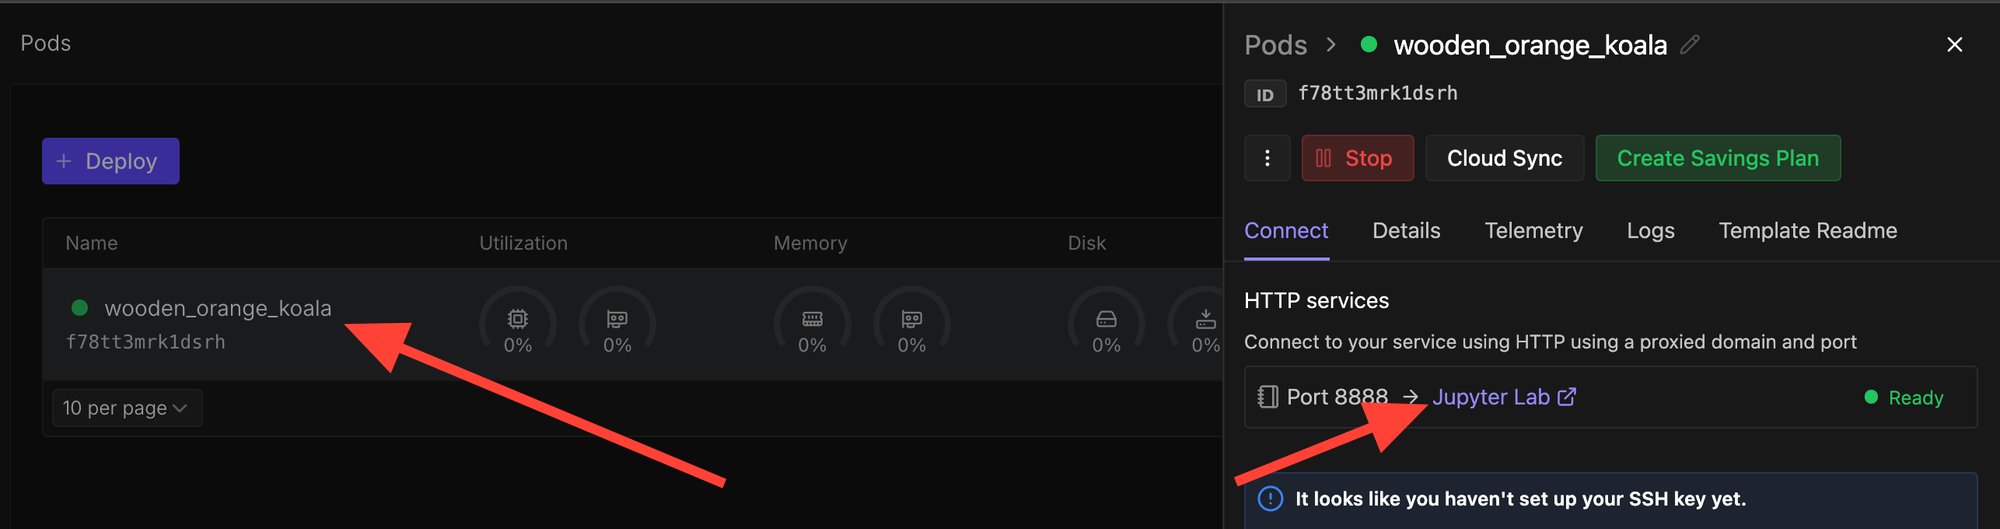
Now click on the deployed pod and select "Jupyter Lab".
Deploy an LLM
Install Dependencies
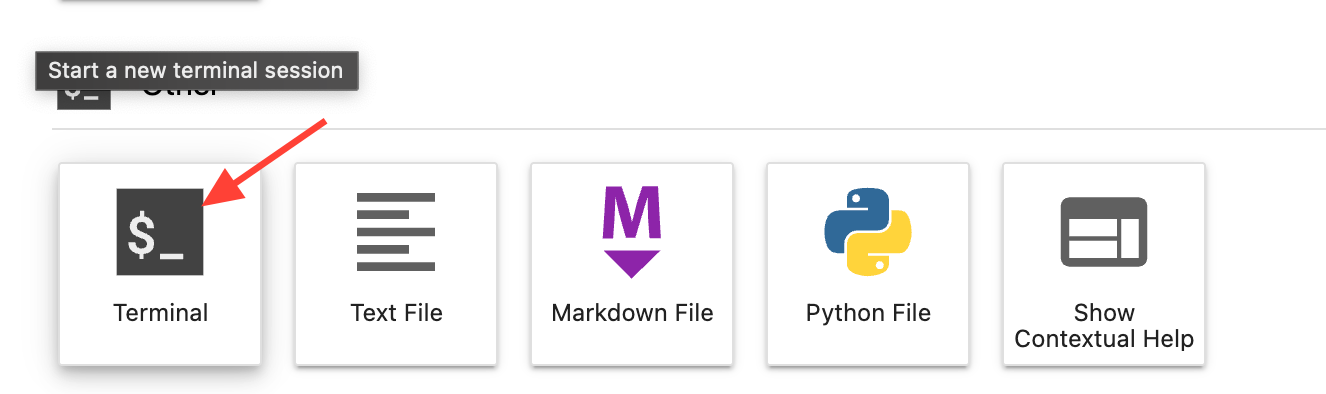
Eric Transformer allows you to run open-source models such as openai/gpt-oss-20b with just a few lines of code. We need to pip install it along with a few other dependencies to run gpt-oss-20b on Runpod. So open a terminal and run the following code.
pip install erictransformer accelerate hf_transferRun the Chatbot
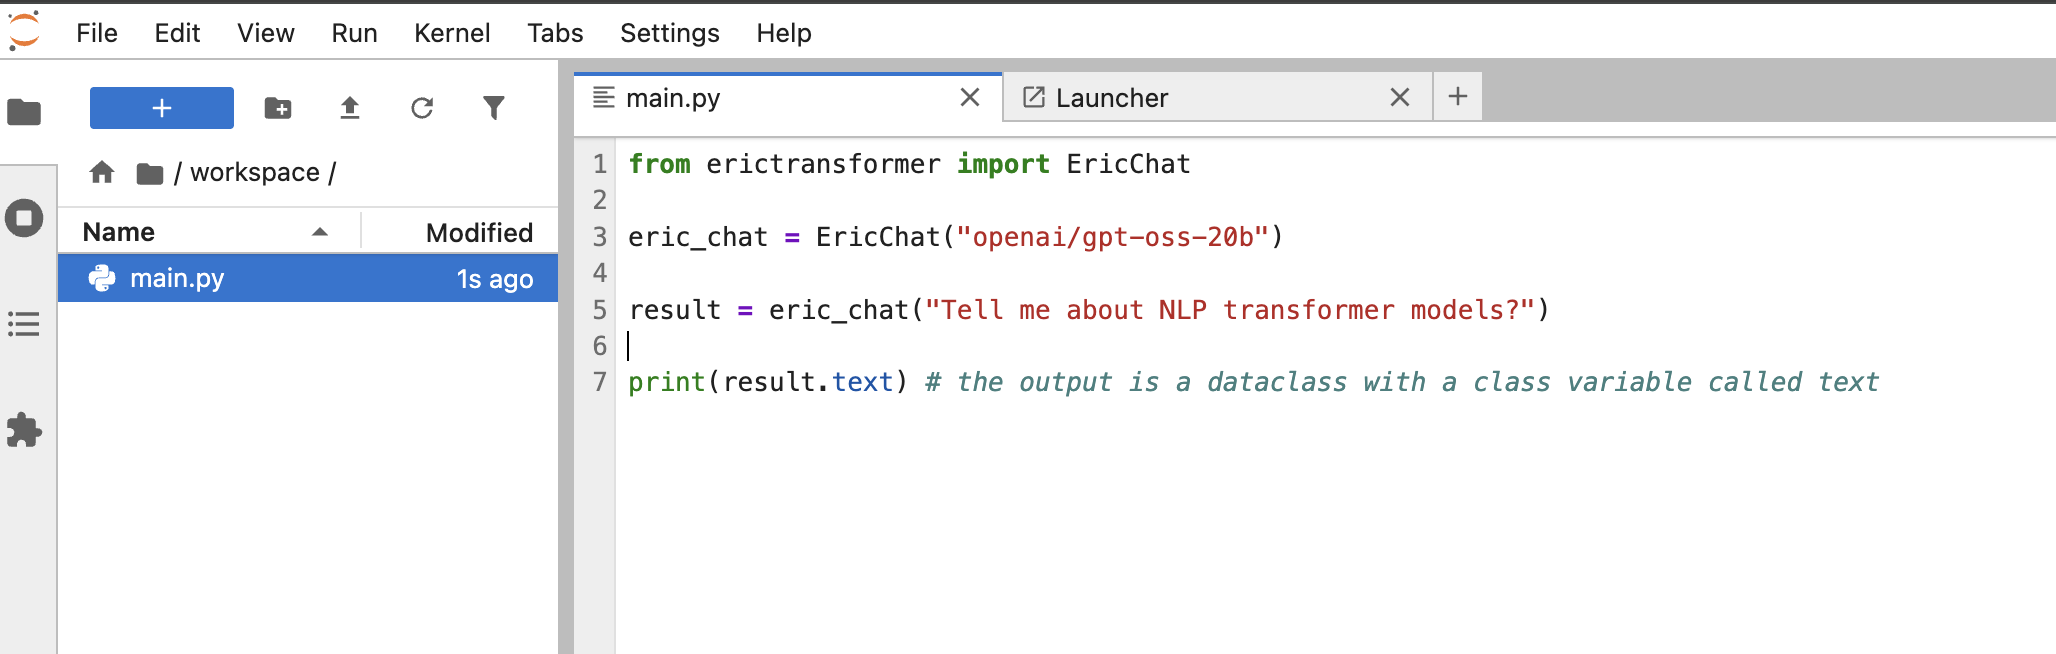
Simply crate a script called main.py within your environment and copy the following code.
from erictransformer import EricChat

eric_chat = EricChat("openai/gpt-oss-20b")

result = eric_chat("Tell me about NLP transformer models?")

print(result.text) # the output is a dataclass with a class variable called text
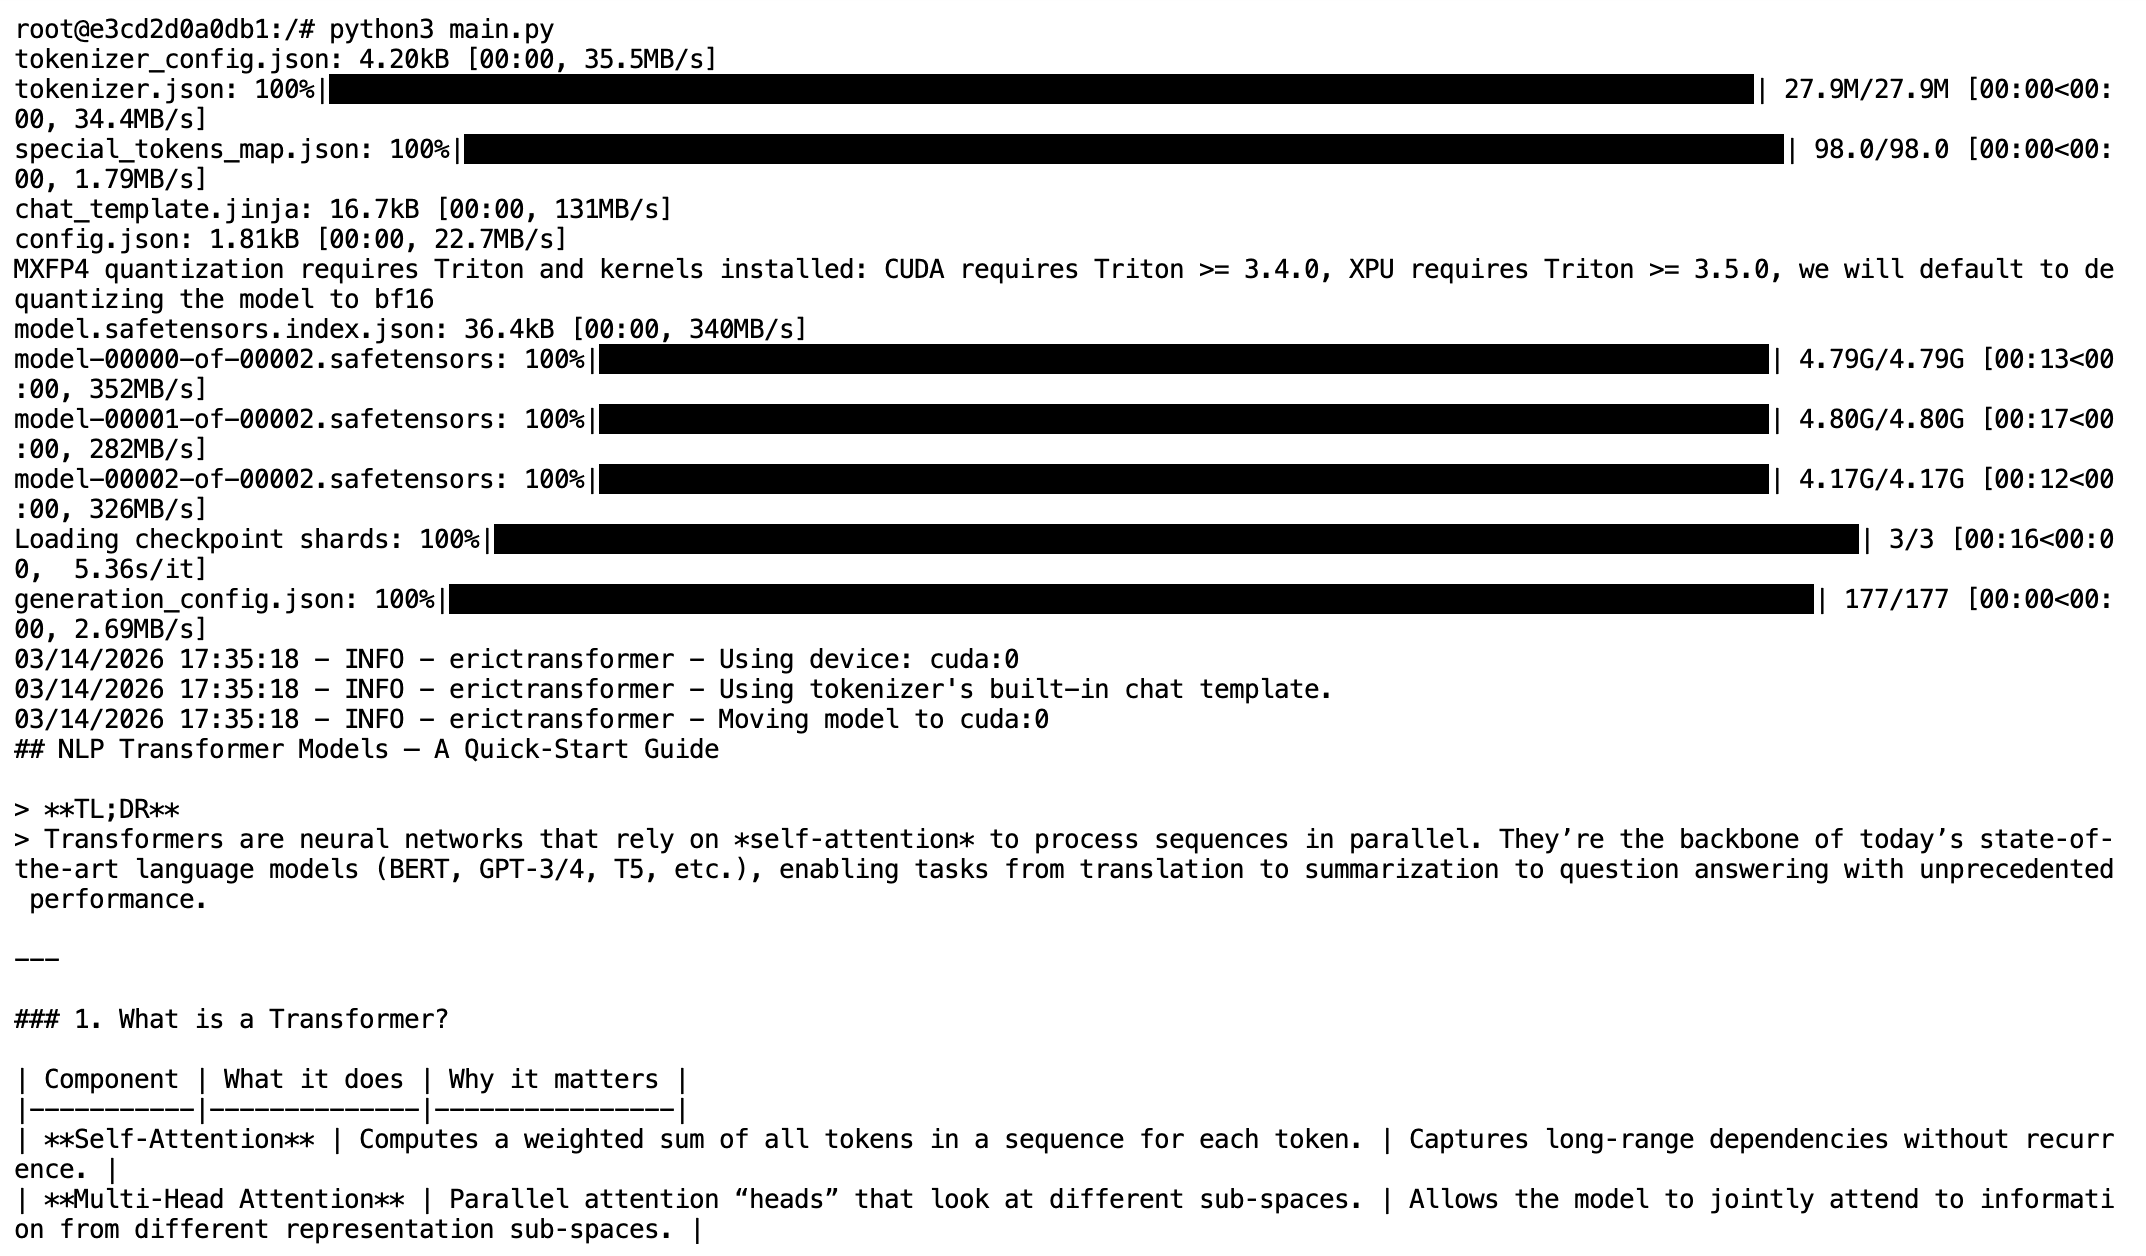
Now run the script with the following command in a terminal:
python3 main.py
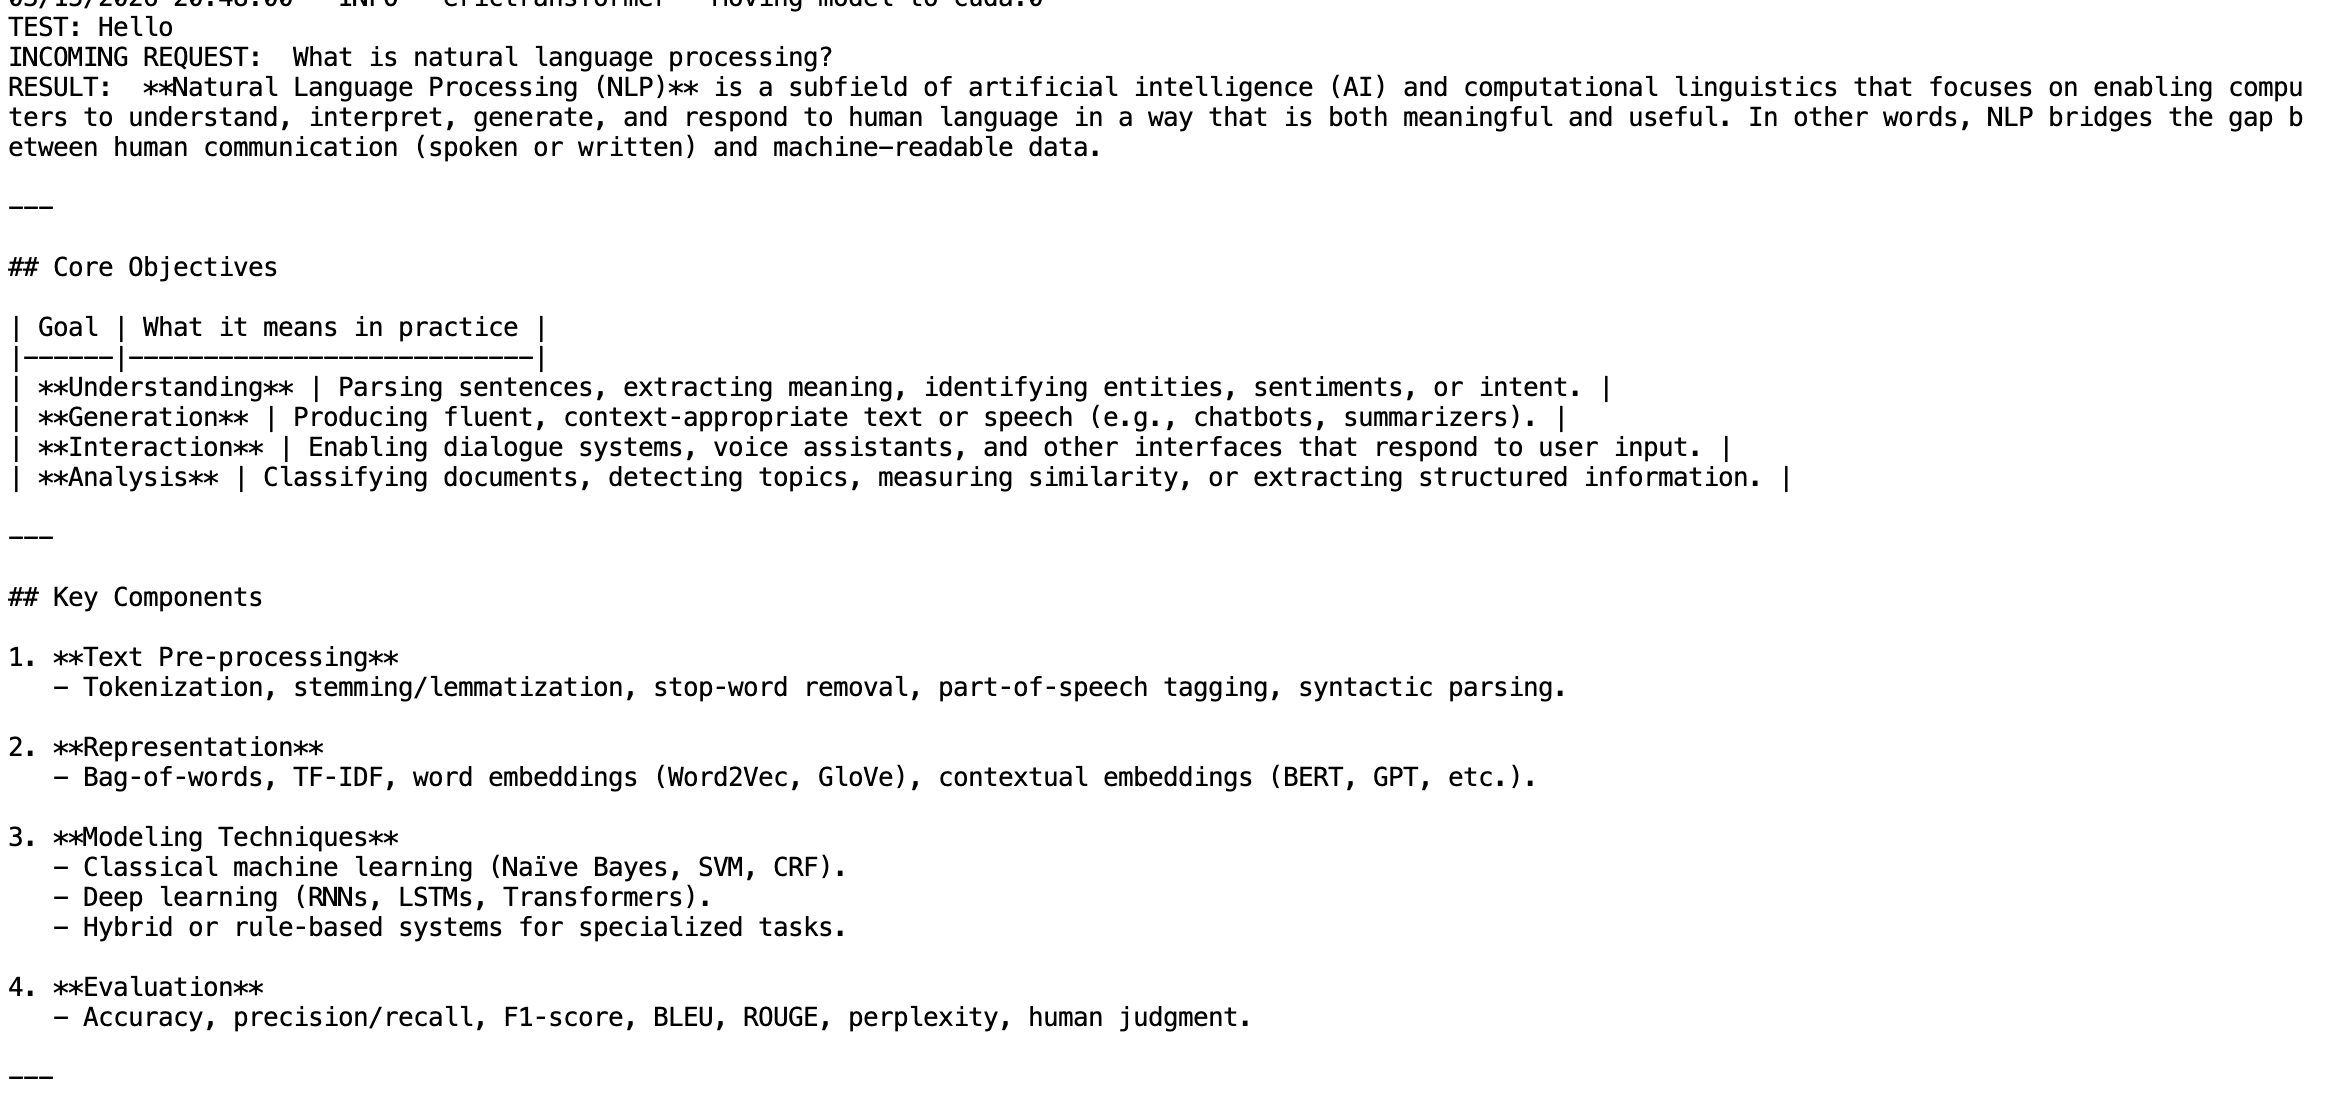
Result:
Adjust Text Generation Parameters
You can adjust the text generation parameters using the Eric Chat's CHATCallArgs(). Below are potential settings you can consider adjusting:
- min_len (default 1): minimum number of generated tokens (including thinking tokens)
- max_len (default 4096): maximum number of generated tokens (also includes thinking tokens)
- temp (default 0.8): temperature. Increasing it causing text to become more 'creative' as it becomes more likely to sample tokens with lower probabilities.
- top_k (default 32): number of tokens that are considered for sampling. Increasing it makes the text more creative.
- top_p (default 0.6): The threshold for the sum of probabilities for tokens that are considered. Increasing it also increases creativity.
from erictransformer import EricChat, CHATCallArgs

eric_chat = EricChat("openai/gpt-oss-20b")

args = CHATCallArgs(temp=0.8, top_k=32, top_p=0.6)

result = eric_chat("Tell me about NLP transformer models?", args=args)

print(result.text)
That's all for the AI text‑generation aspect for now. Soon we'll use Anvil's Uplink functionality to connect our model running on Runpod to the web app.
Create a Web App With Anvil
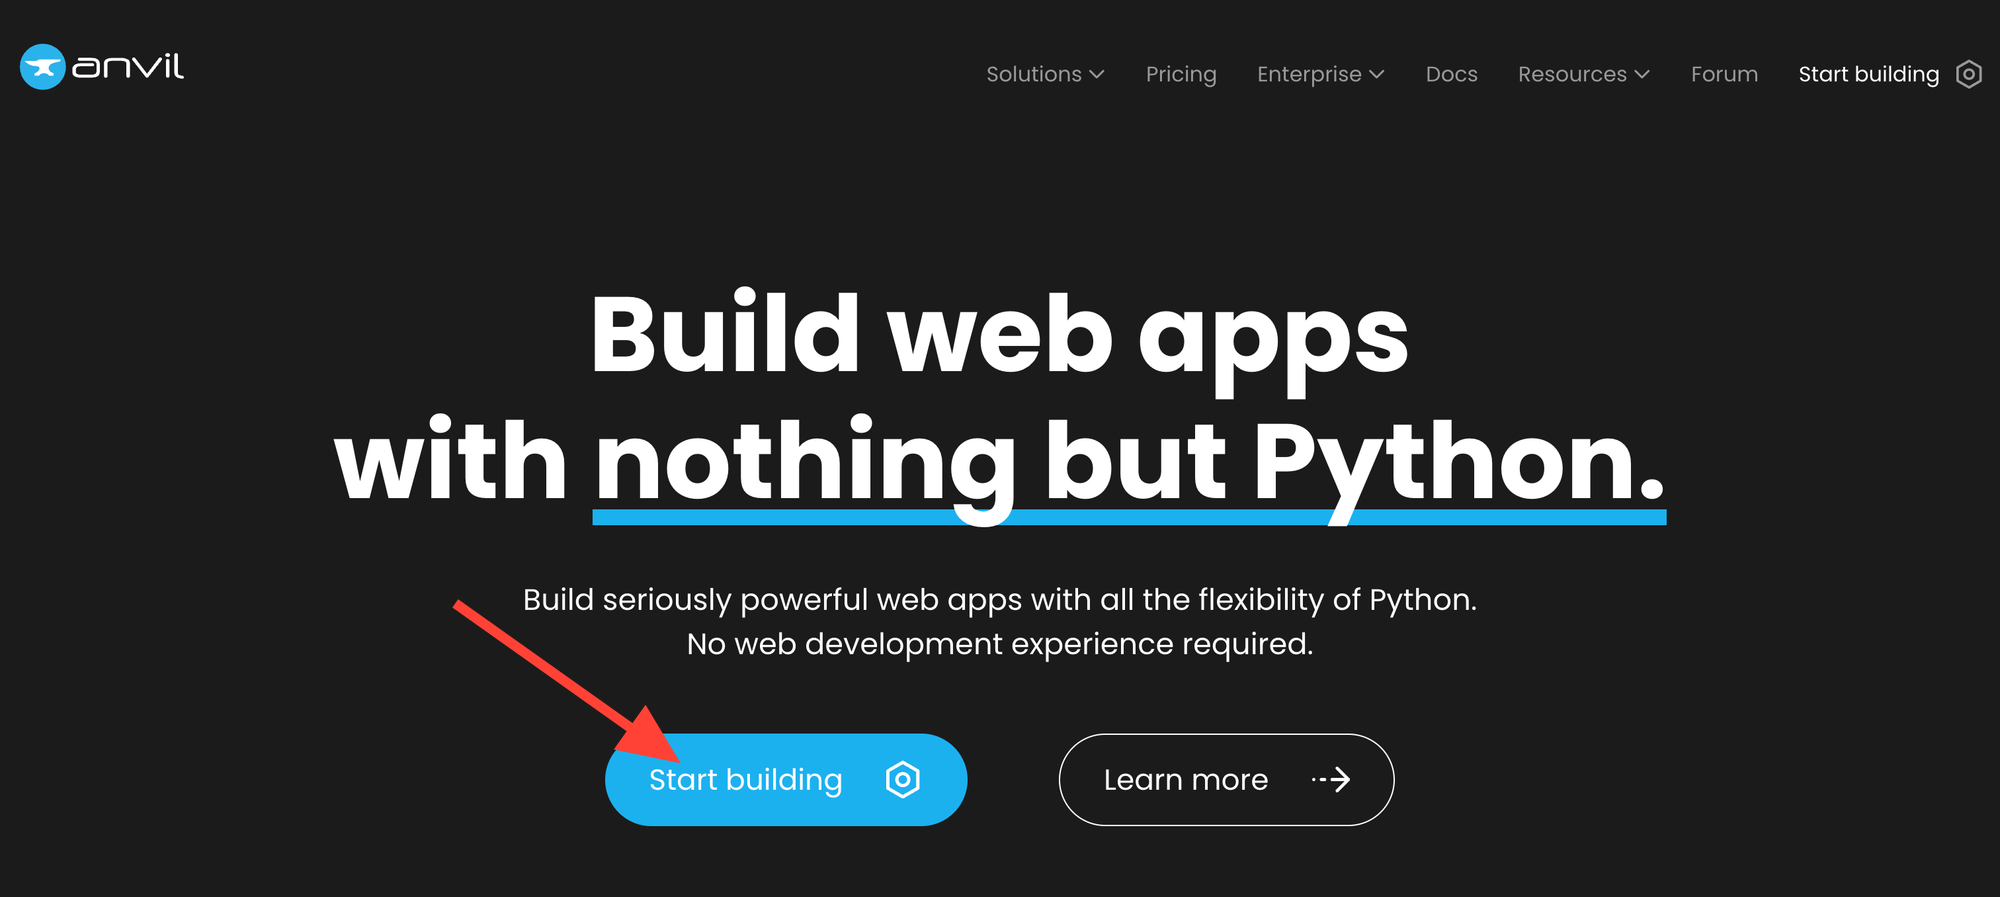
Head over to anvil.works and click "Start building."
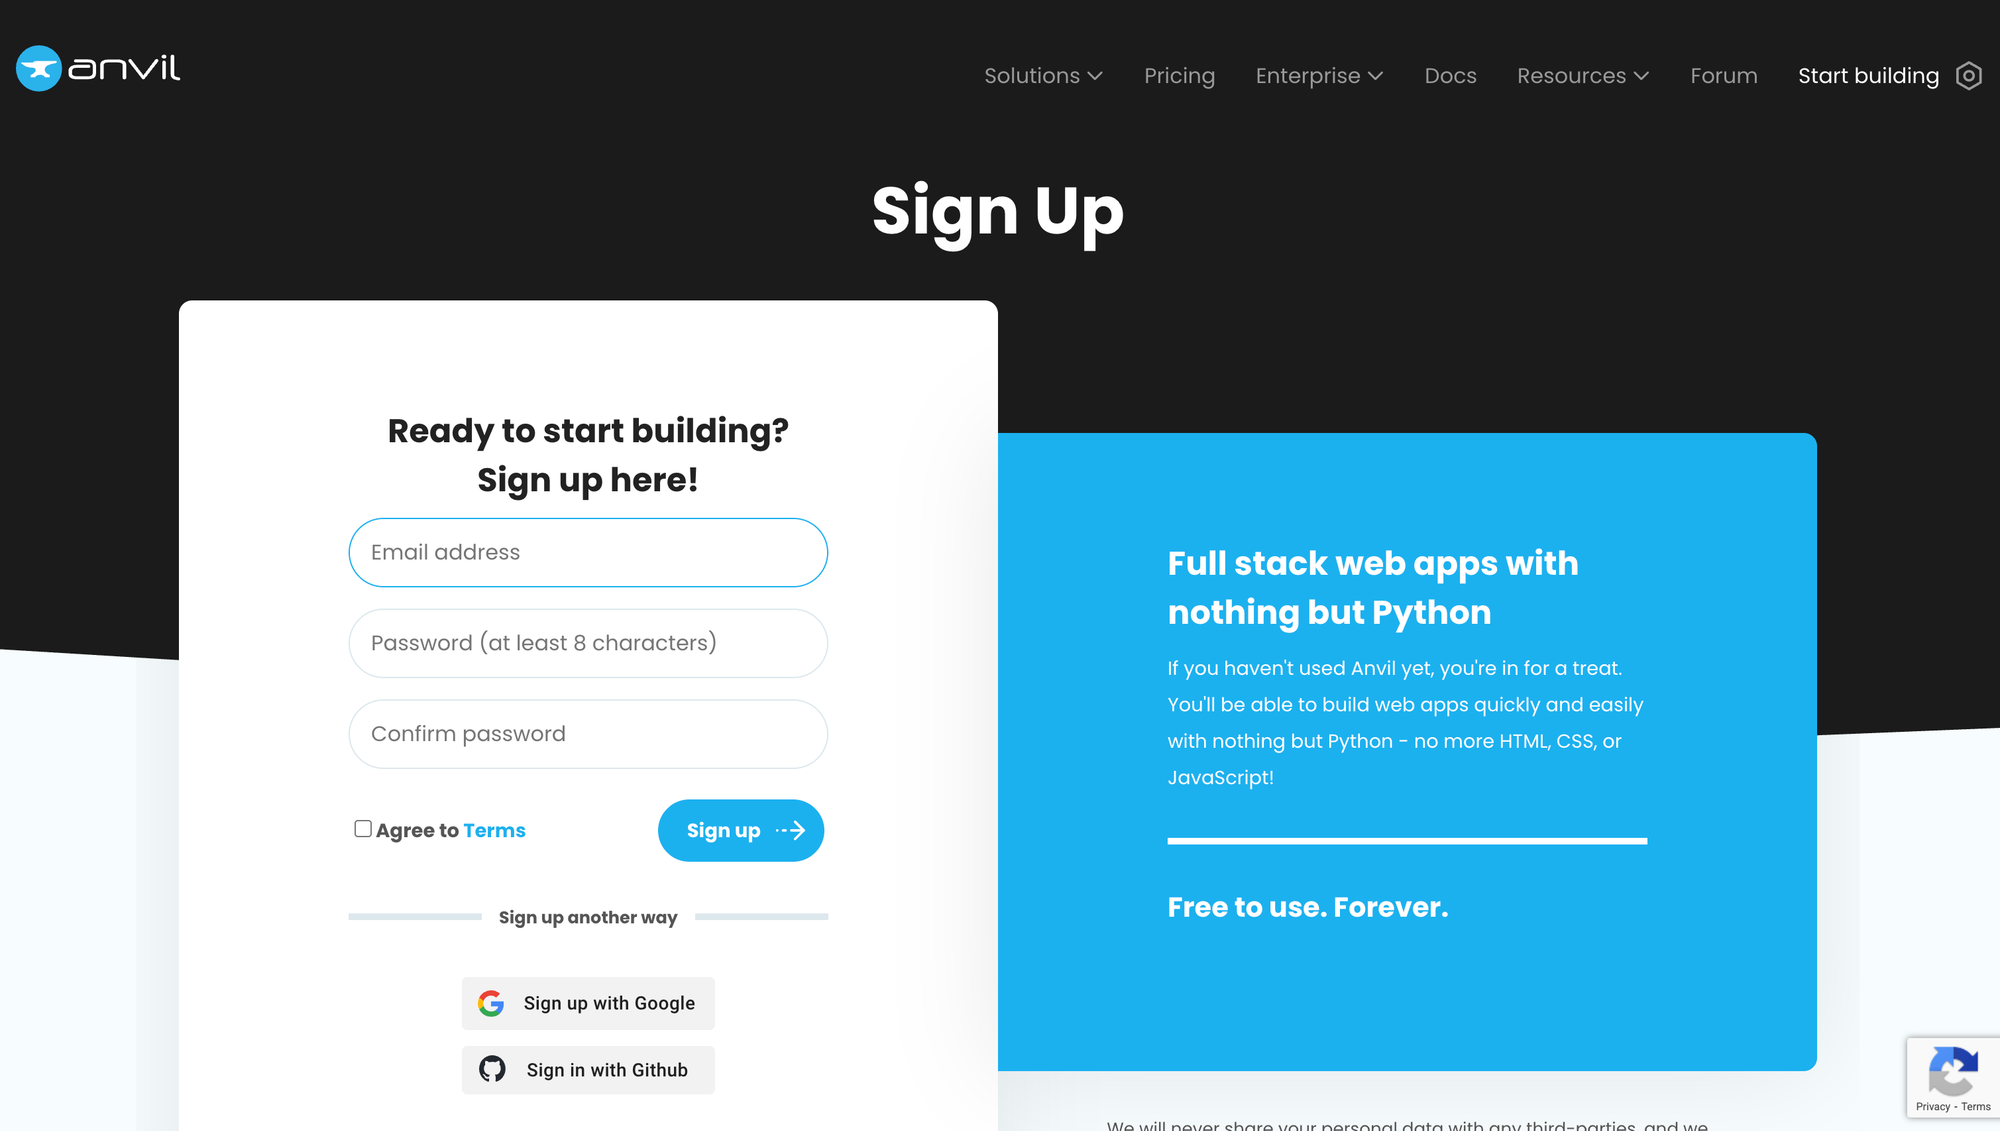
Create an account.
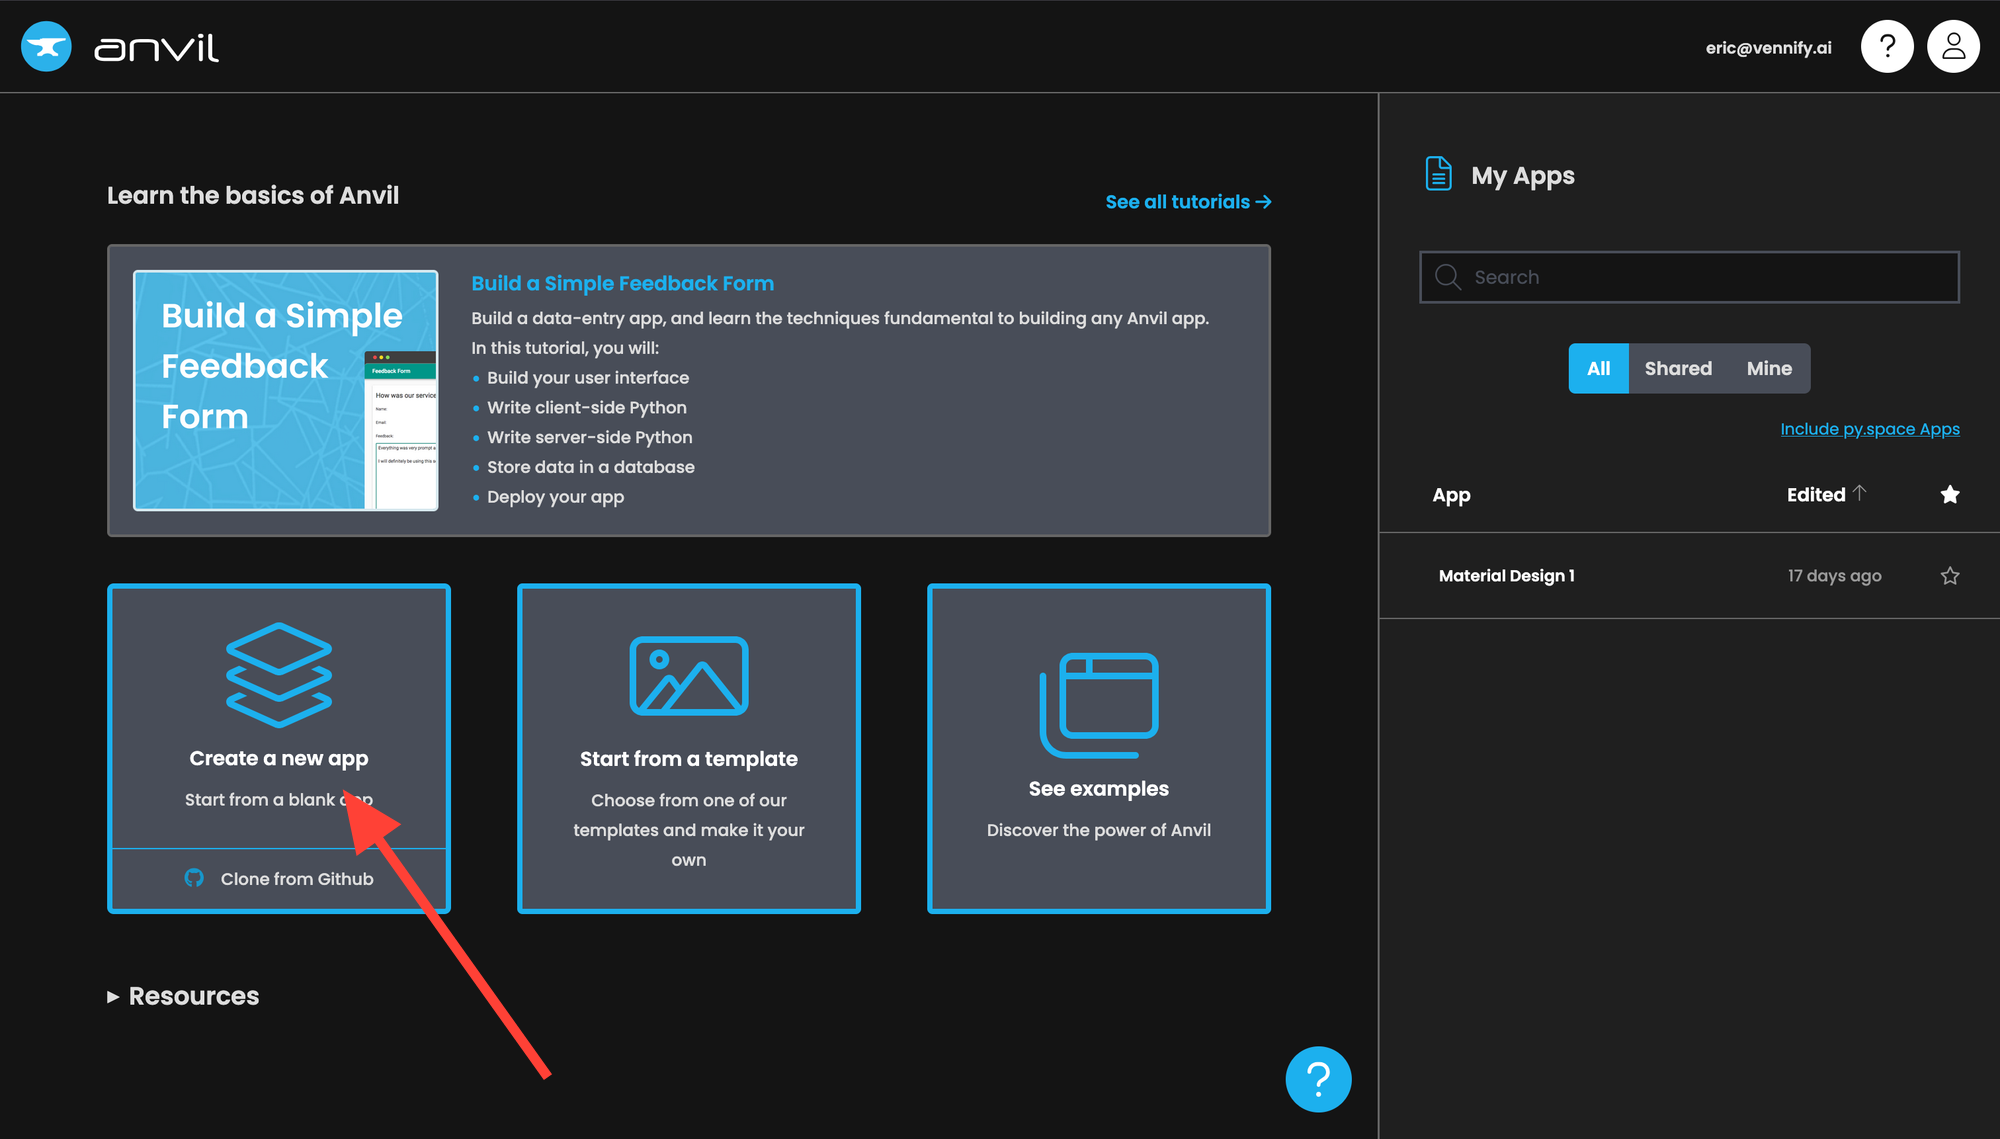
Click "Create a new app."
Click "Material Design."
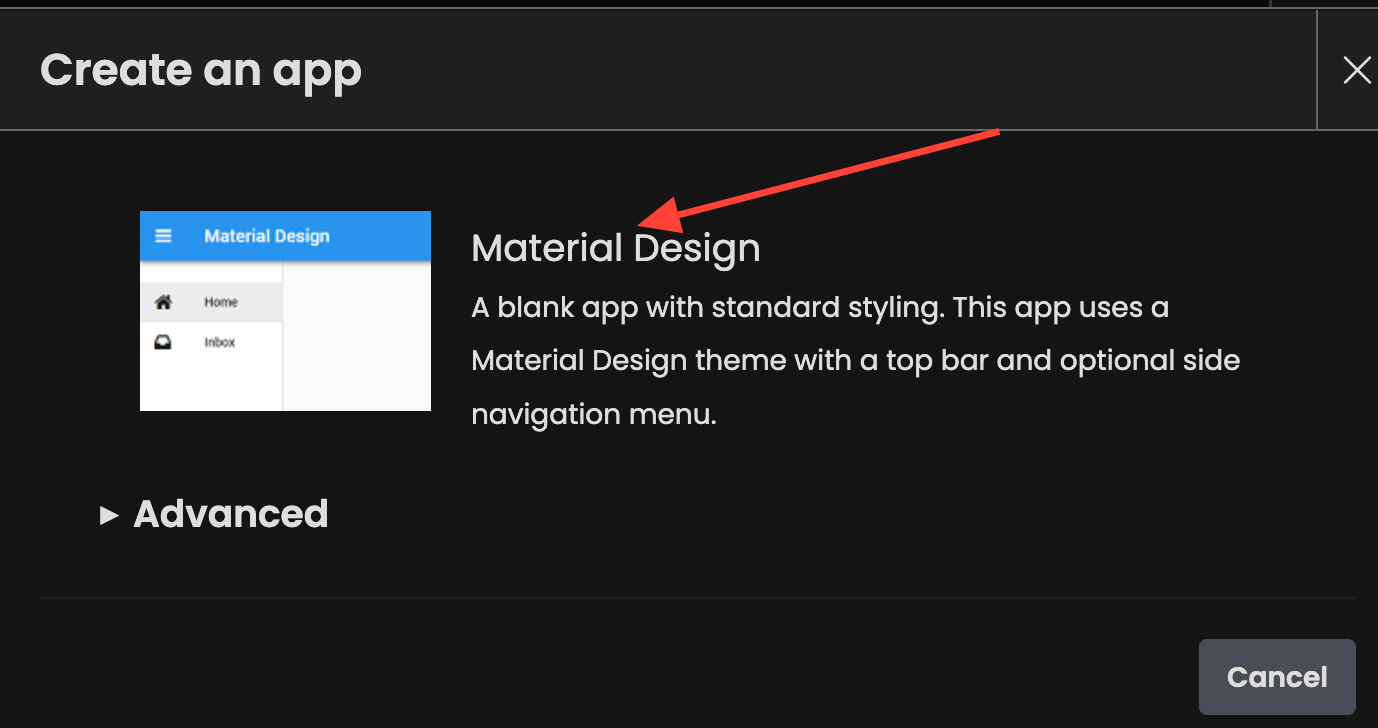
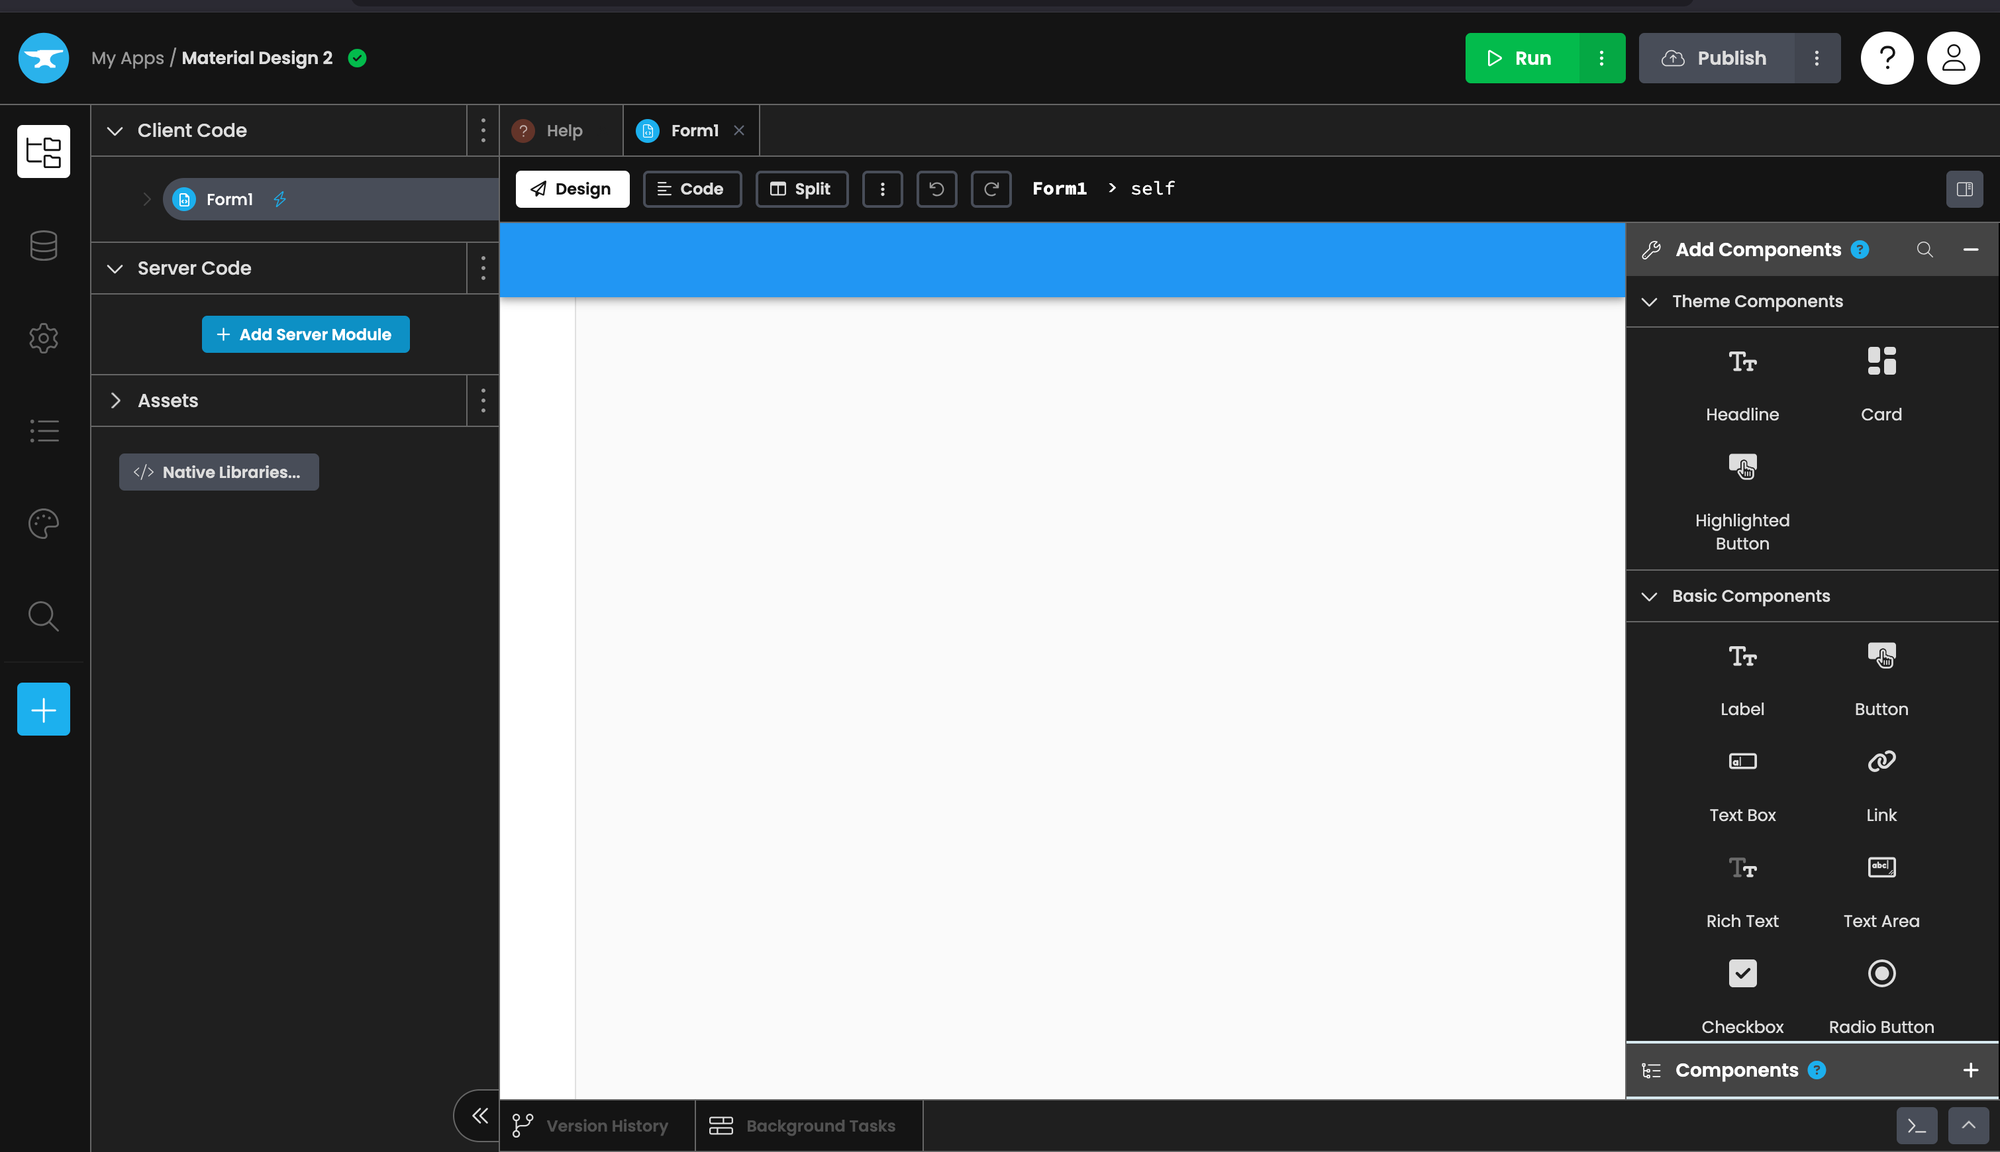
You will be presented with an interface that looks like this. Don't worry, it's easy.
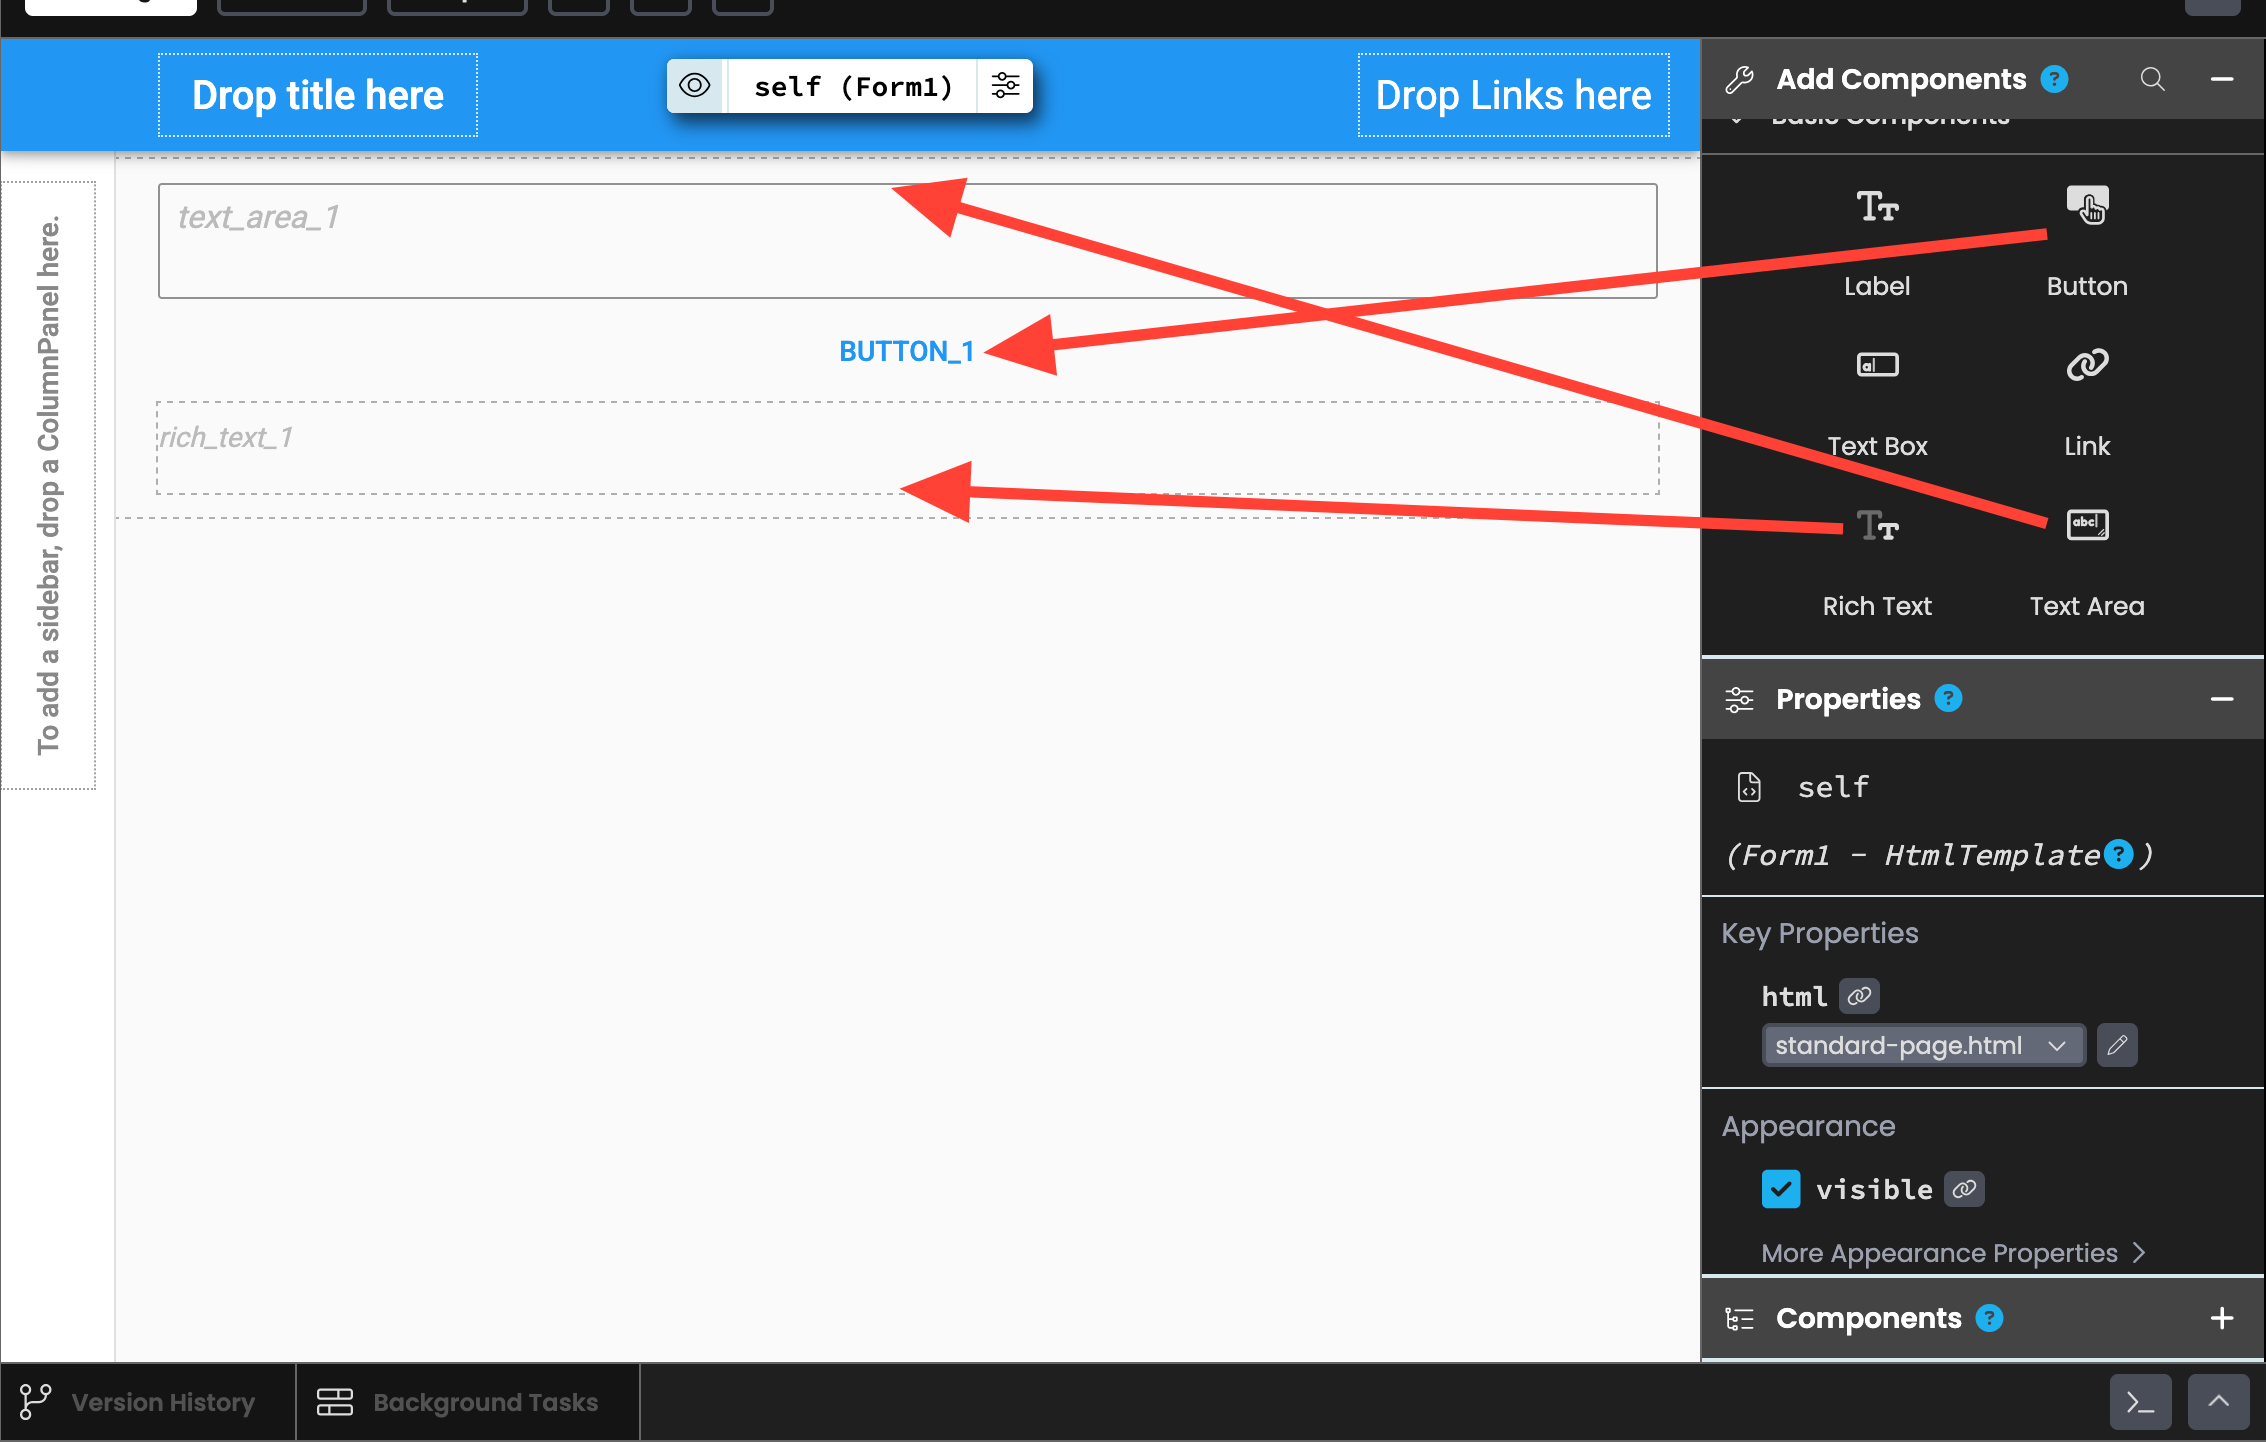
Drag a Text Area component into the UI. Then drag a Button right below the text area. Finally, drag a Rich Text component beneath the button.
Now click on the button and adjust its "text" property to "SUBMIT."
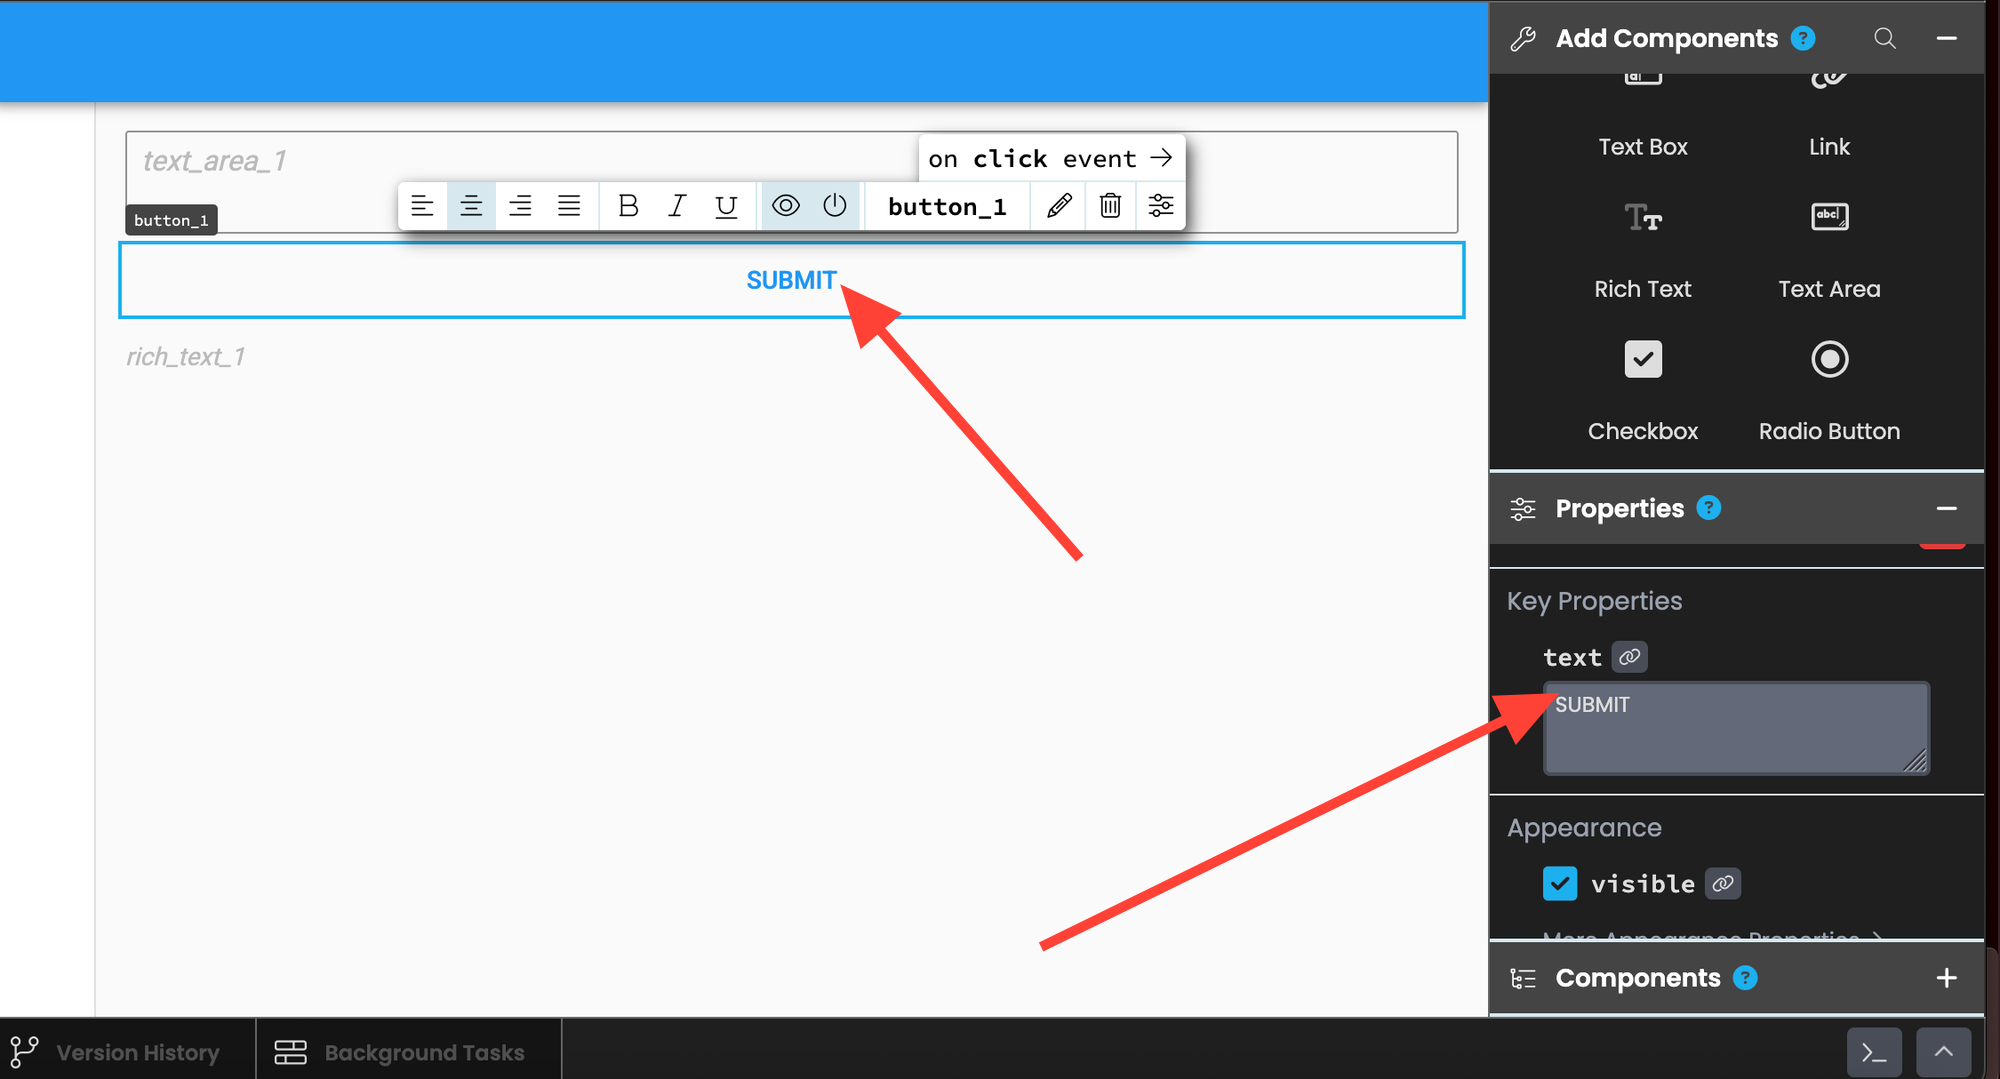
Then scroll down and select "on-click."

This will bring you to the front‑end code tab and automatically generate code for when the button is clicked.
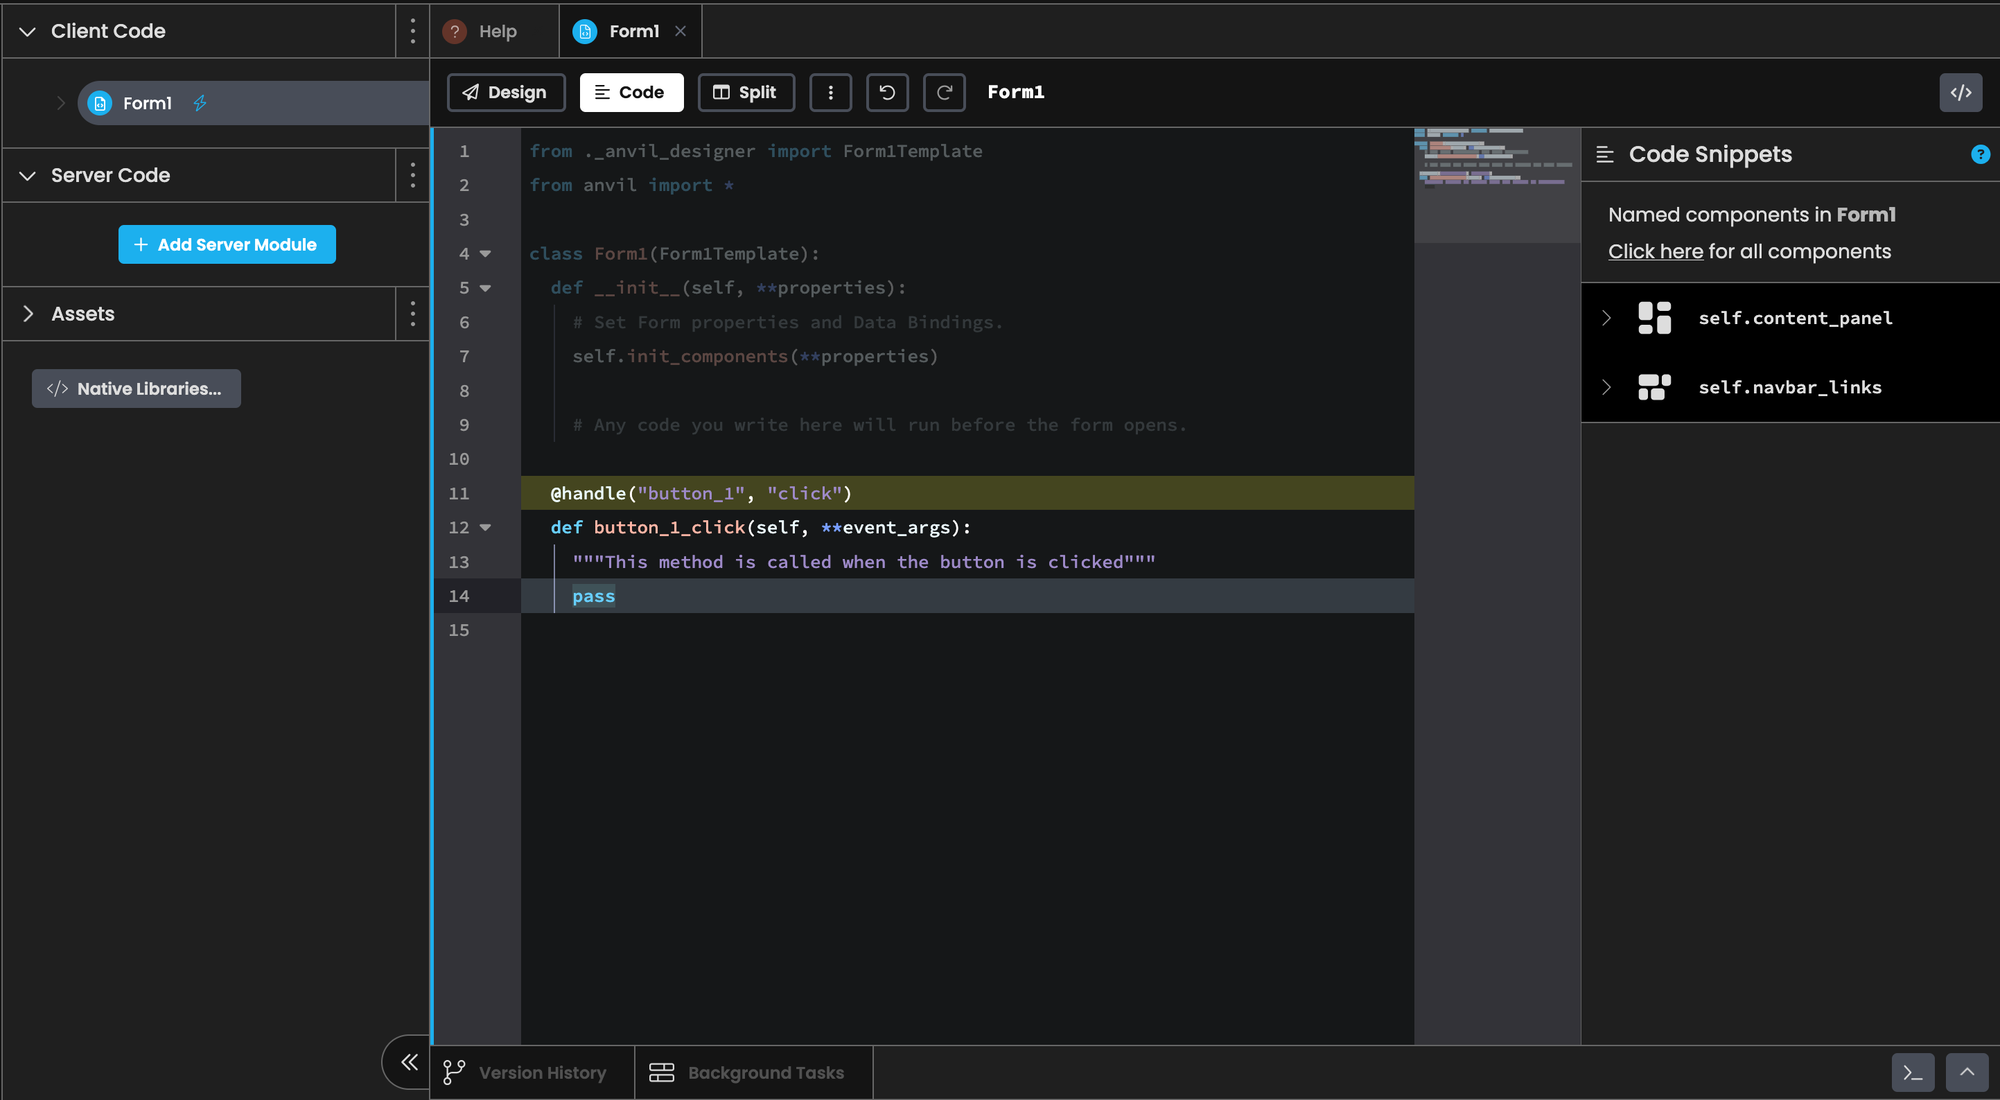
from ._anvil_designer import Form1Template
from anvil import *
import anvil.server

class Form1(Form1Template):
  def __init__(self, **properties):
    # Set Form properties and Data Bindings.
    self.init_components(**properties)

    # Any code you write here will run before the form opens.

  @handle("button_1", "click")
  def button_1_click(self, **event_args):
    """This method is called when the button is clicked"""
    user_text = self.text_area_1.text
    self.text_area_1.text = ""
    result = anvil.server.call("generate", user_text)
    self.rich_text_1.content = result
Let's explain the code we added line-by-line.
Import's anvil's server code:
import anvil.serverGrab the text from the text area box, which is defined with the class variable self.text_area_1 and store it in a variable called user_text:
user_text = self.text_area_1.text
Set the text area box to a blank string. This way when users press the button the text area is cleared and is ready for their next prompt:
self.text_area_1.text = ""
Send the text to our server function called generate which we'll create later on in the tutorial:
result = anvil.server.call("generate", user_text)
Set the content of the rich‑text box (represented by self.rich_text_1) to the output of the server call.
self.rich_text_1.content = result
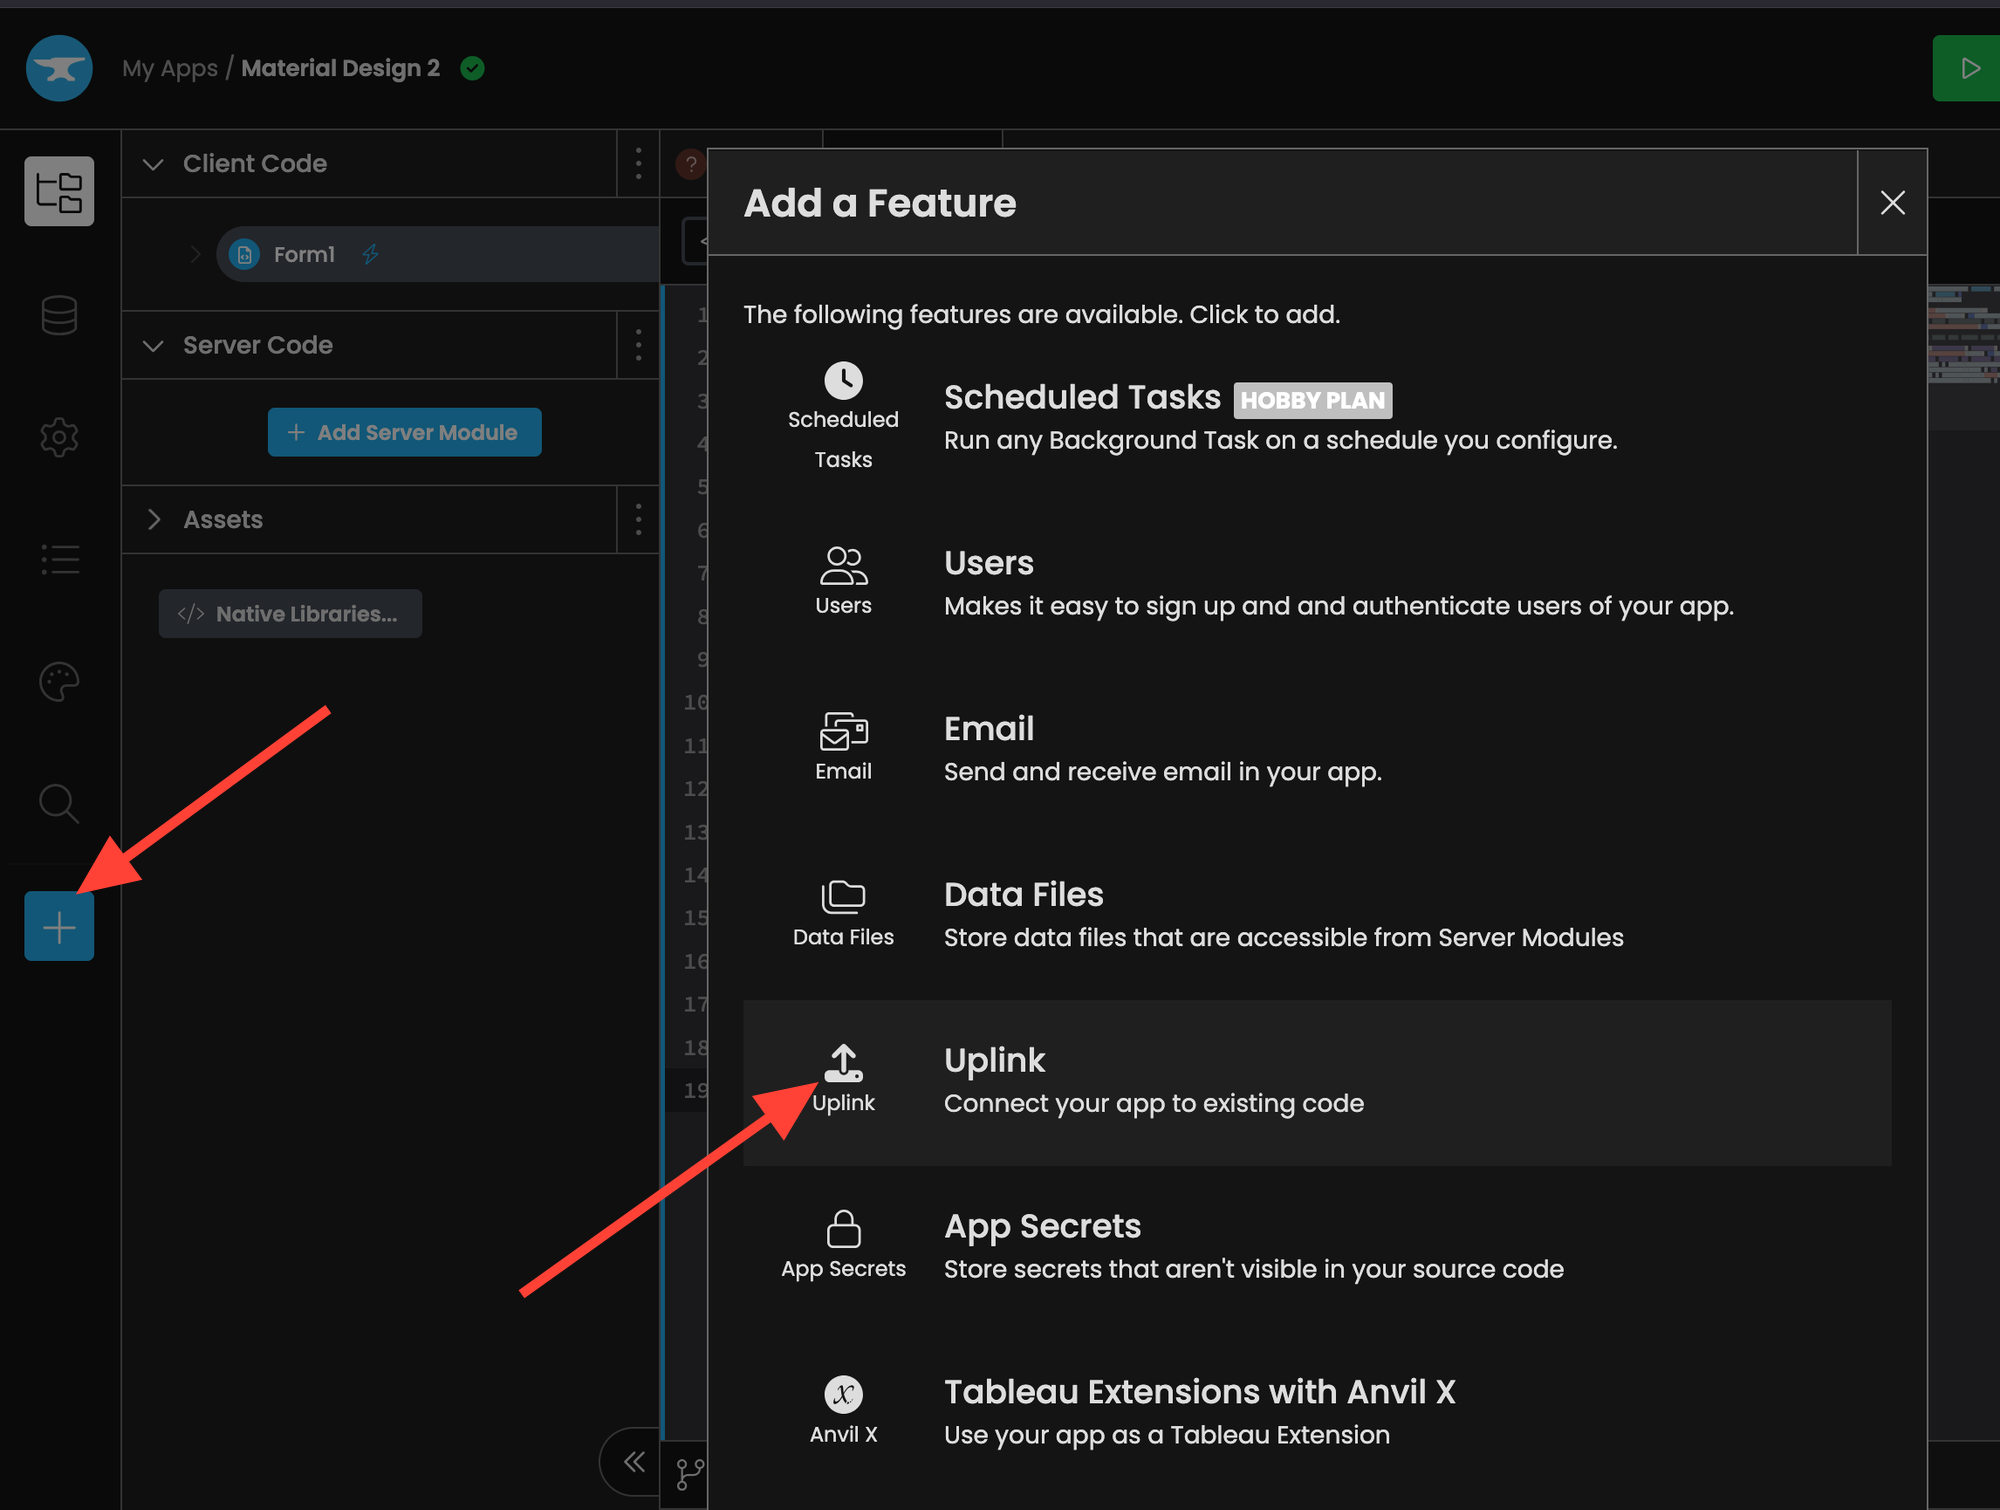
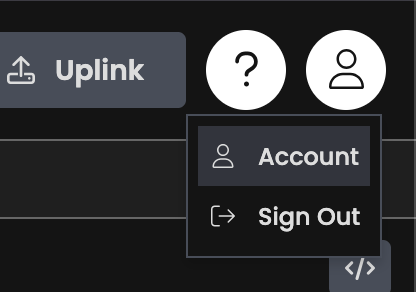
Enable Anvil Uplink
Anvil makes it easy to connect the front‑end to your Runpod instance. We simply need to enable the “Uplink” functionality and convert the Python script into a callable server function.
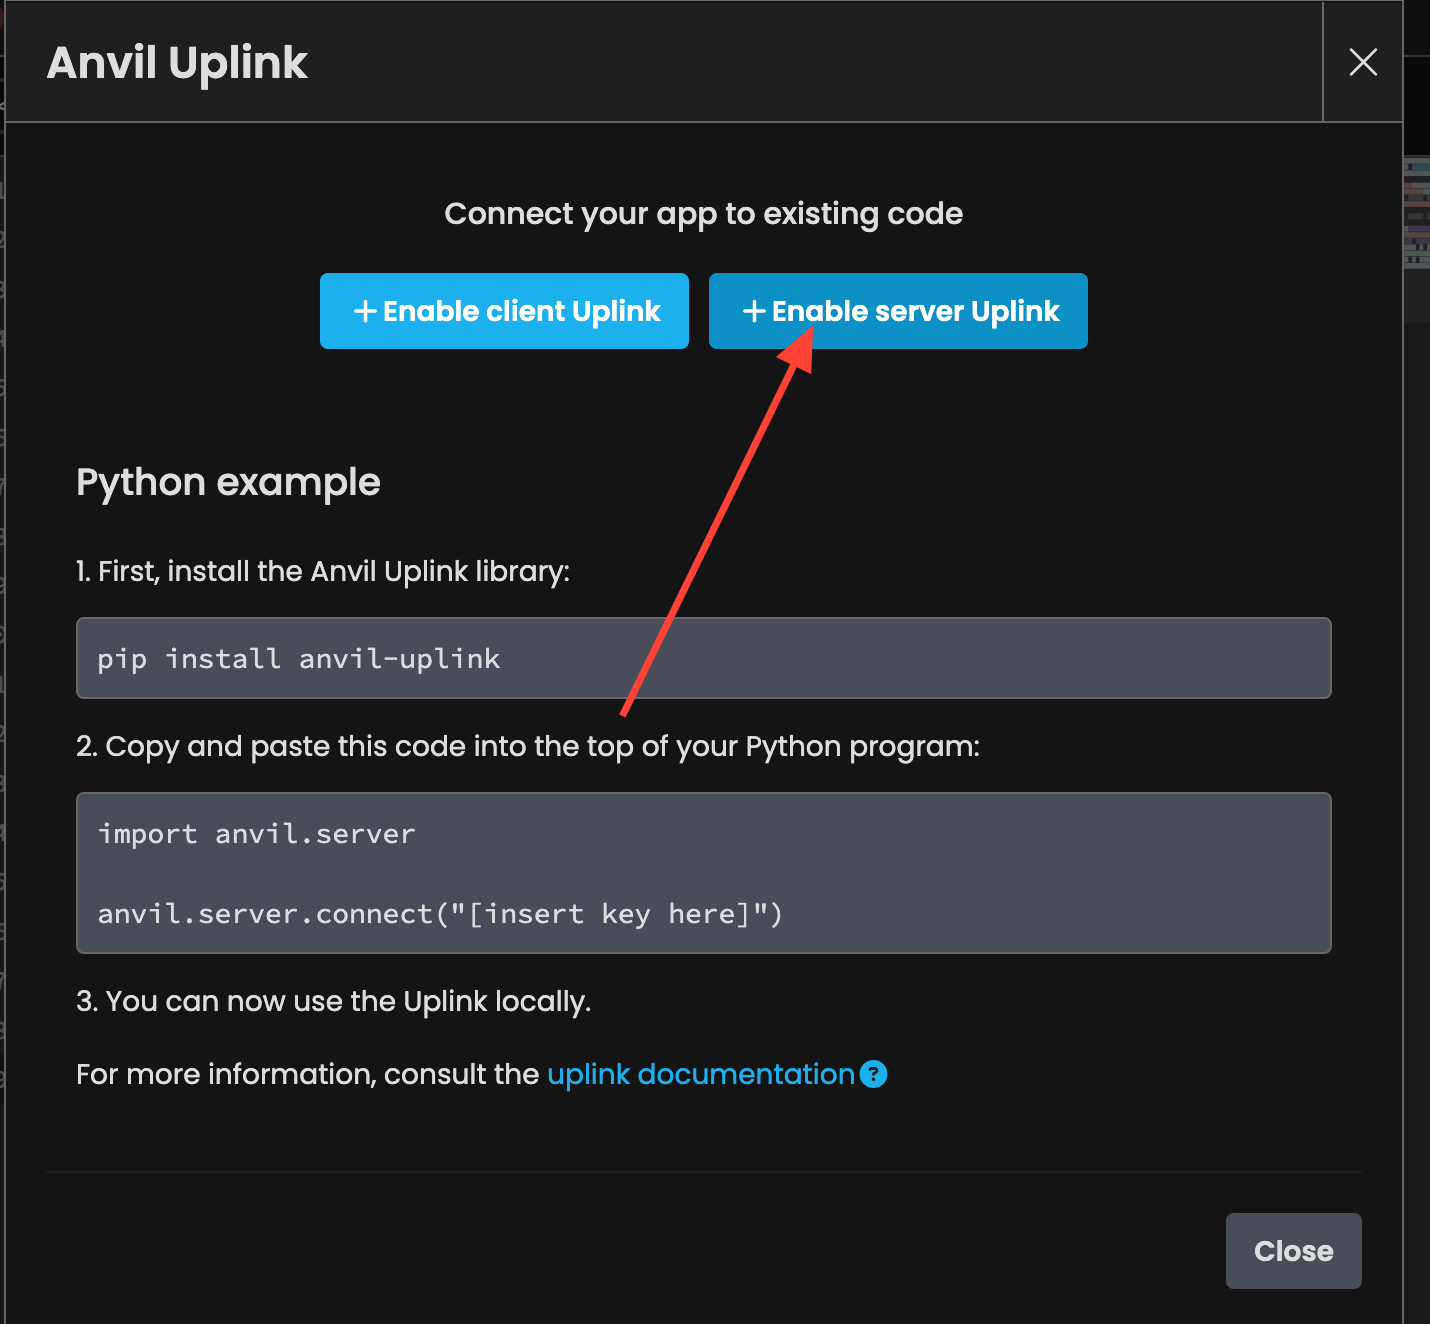
Save this key for later, we'll need it for the next step.
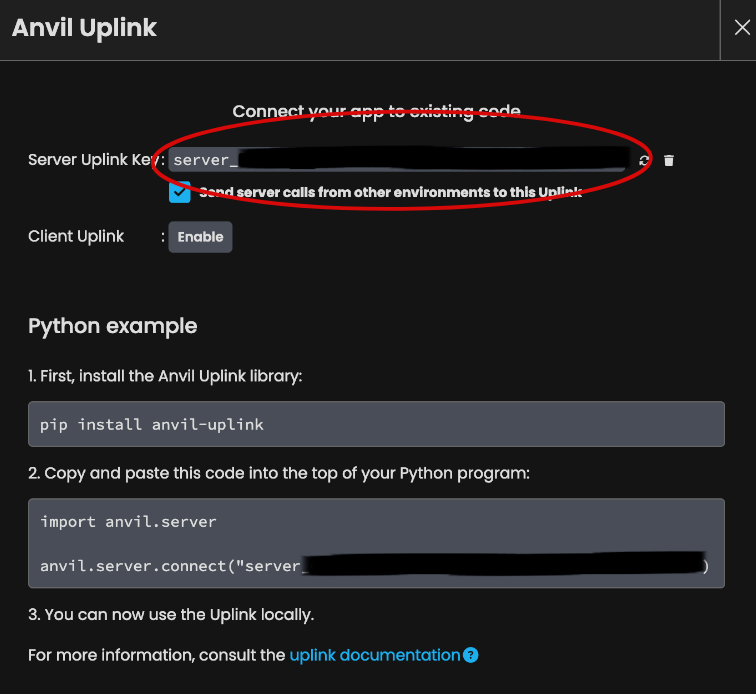
Create an Anvil Callable Function
Let's head back to Runpod and convert our script into an Anvil callable server function. This way, our front‑end code can communicate with the model running on our Runpod instance.
First we pip install anvil-uplink.
pip install anvil-uplinkNow, let’s add our server key as an environment variable.
export KEY="server_KEY"Here's the final main.py script.
import os
import anvil.server
from erictransformer import EricChat, CHATCallArgs


eric_chat = EricChat("openai/gpt-oss-20b")

args = CHATCallArgs(temp=0.8, top_k=32, top_p=0.6)

test_generation = eric_chat("Say hello and nothing more", args=args)

print("TEST:", test_generation.text)

@anvil.server.callable
def generate(user_text: str):
    print("INCOMING REQUEST: ", user_text)
    result = eric_chat(user_text, args=args)
    print("RESULT: ", result.text)

    return result.text

anvil.server.connect(os.getenv("KEY"))

anvil.server.wait_forever()
The code below imports the os module so we can retrieve the environment variable containing the key, and it also imports Anvil’s server module.
import os
import anvil.server
When an EricChat() object is created, the model isn’t moved to the GPU automatically until training or inference occurs. So we performed a quick generation to move the model to the GPU.
test_generation = eric_chat("Say hello and nothing more", args=args)
print("TEST:", test_generation.text)
We wrapped the inference code in a function with the decorator @anvil.server.callable. Notice how the function returns a string; this matches the expected return type from our front‑end logic code earlier.
@anvil.server.callable
def generate(user_text: str):
    result = eric_chat(user_text, args=args)
    return result.text
This code connects our script to Anvil using the key.
anvil.server.connect(os.getenv("KEY"))
Finally, the line below causes the script to enter a forever loop, where it monitors incoming requests and forwards them to our generate function.
anvil.server.wait_forever()
Now we can run main.py like before.
python3 main.py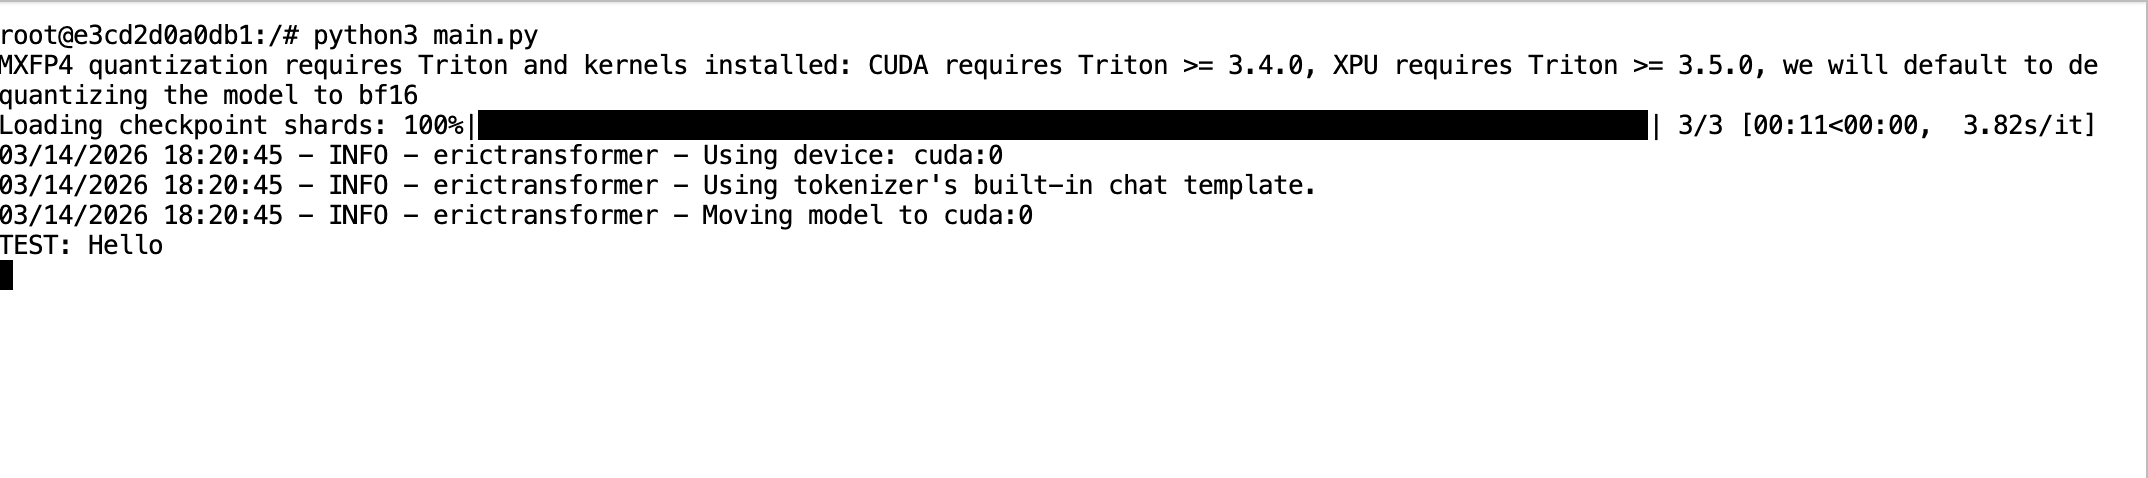
Test the App
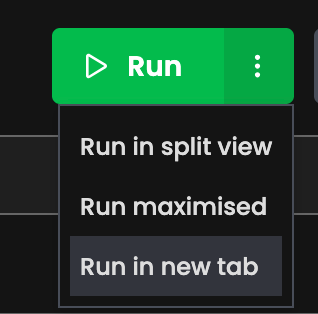
Head over to Anvil and click Run! We prefer clicking the side button and then selecting “Run in new tab.”
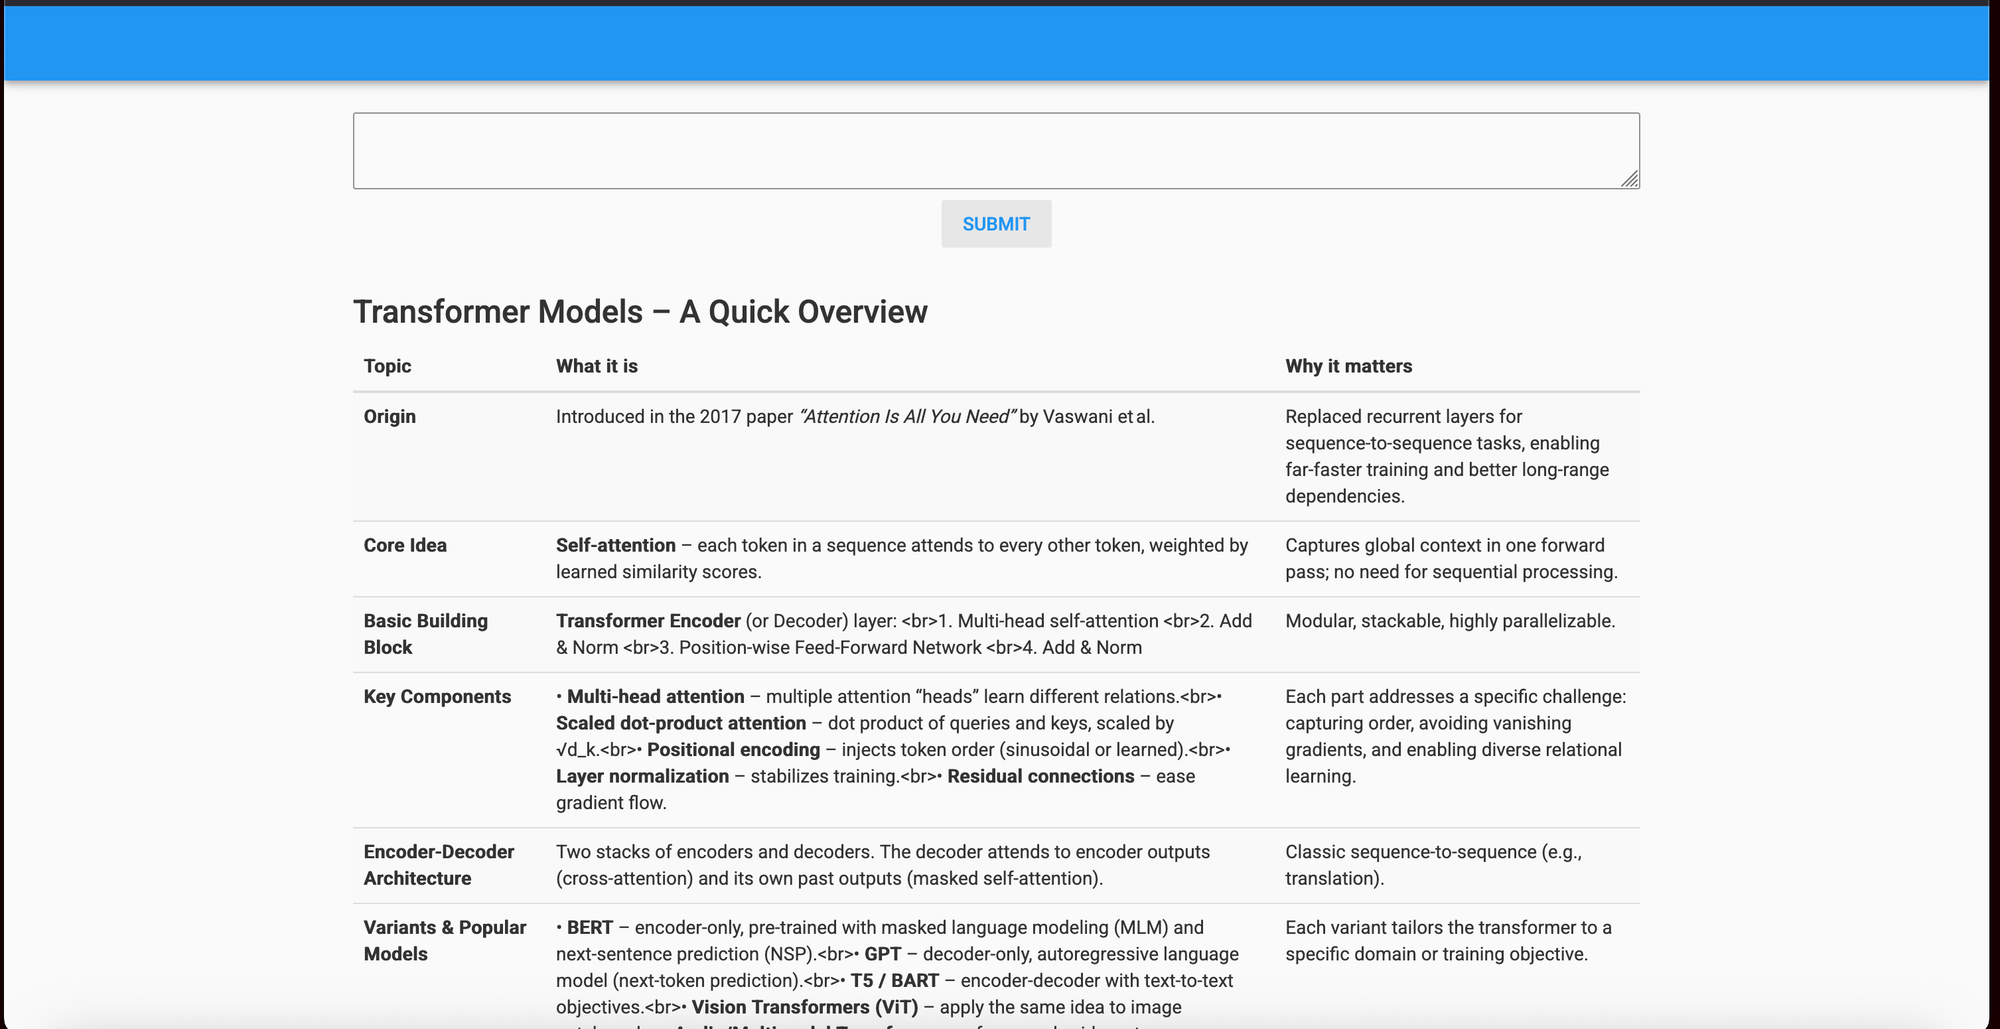
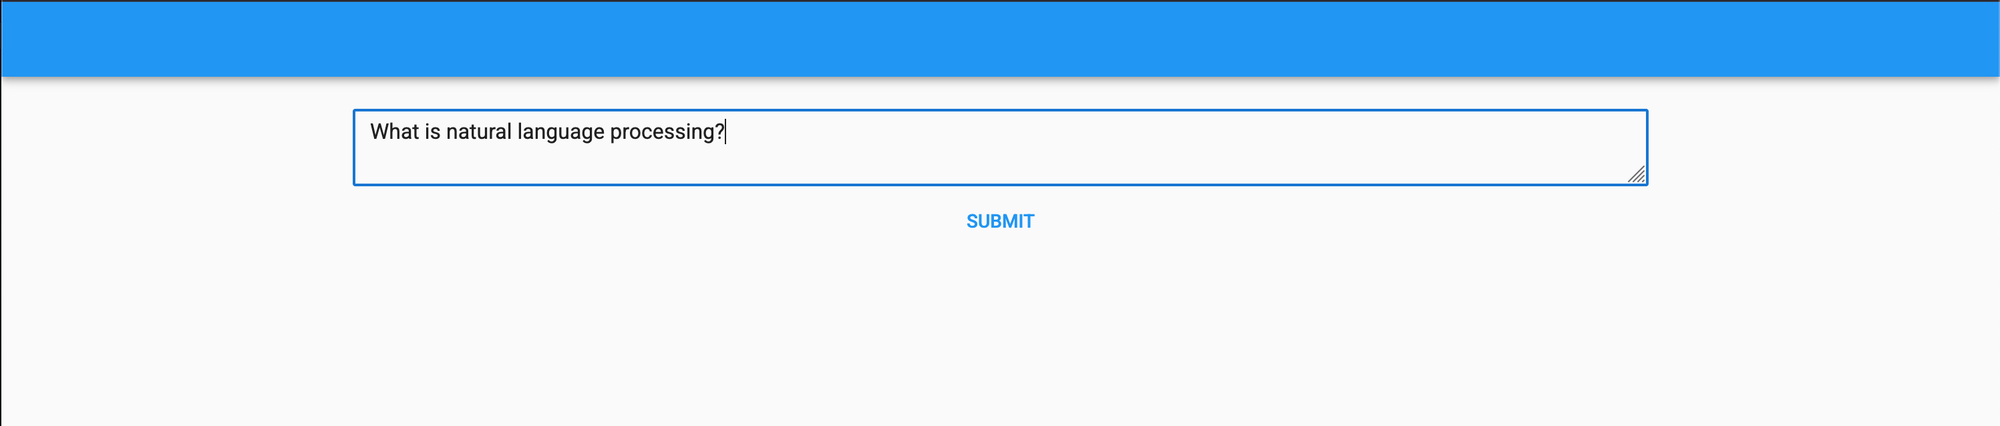
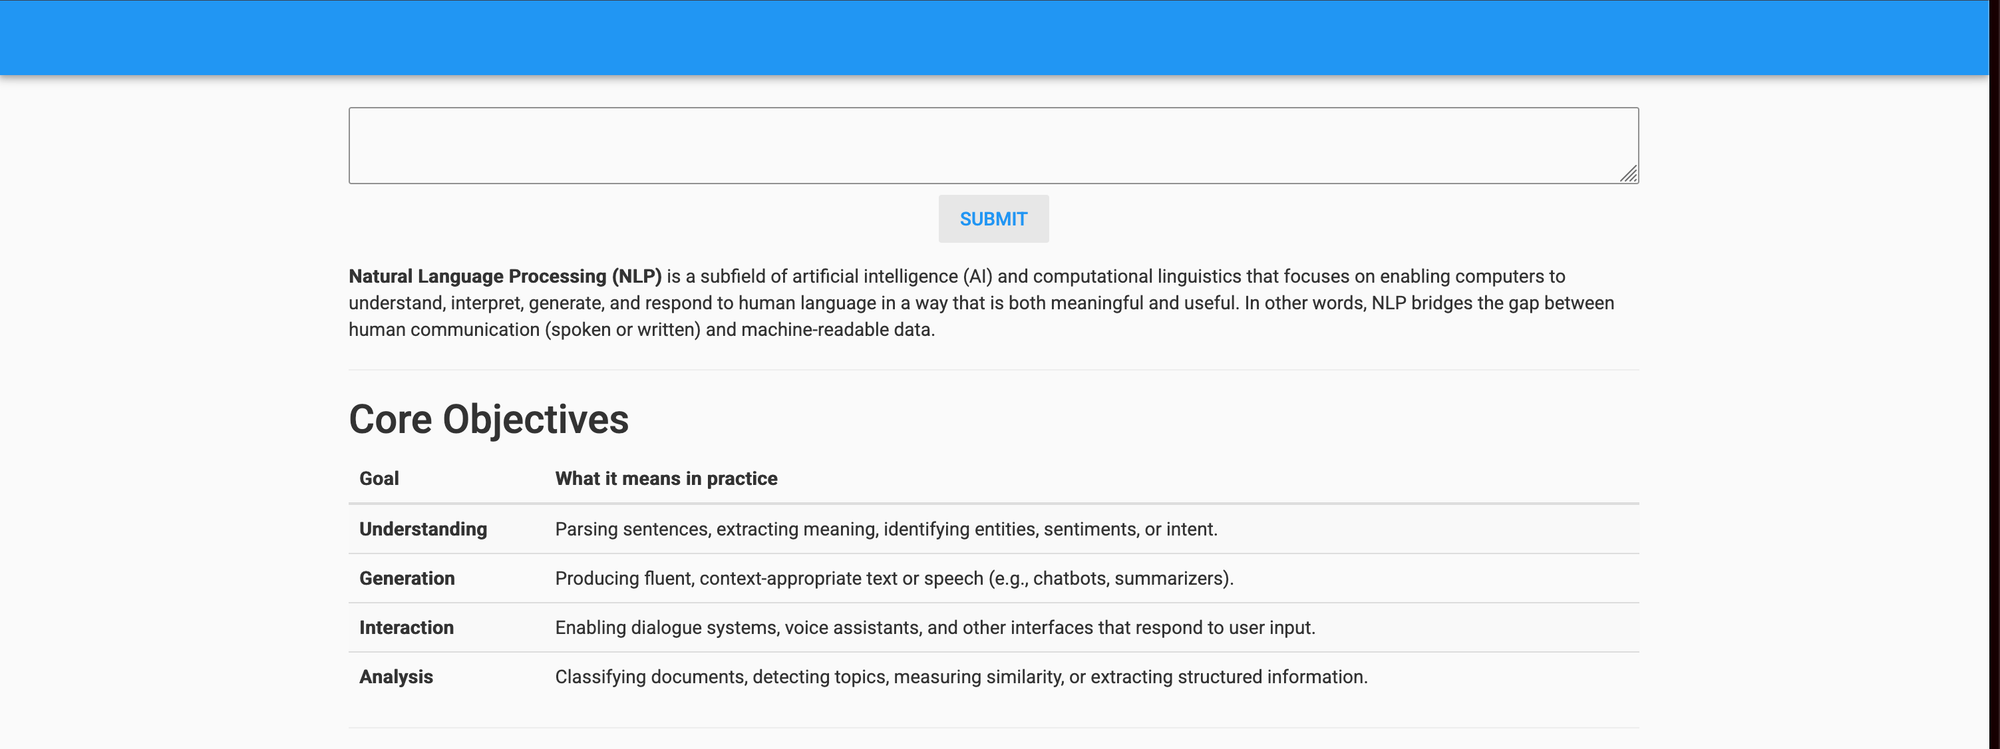
Here’s the web app! Type something into the text box and press the button.
We now see a loading indicator as the result is being generated.

The Runpod terminal will display the incoming request and the result.
Anvil's Server Module
Right now we’re calling the AI model hosted on Runpod from the client side. We recommend performing this operation from Anvil’s server so that the hosted model isn’t called directly from the client. This becomes important if your app grows beyond a simple prototype, as you’ll want to add authentication, rate‑limiting, and other features. For example, before calling the AI model you may want users to sign in and limit the number of calls they can make to the model.
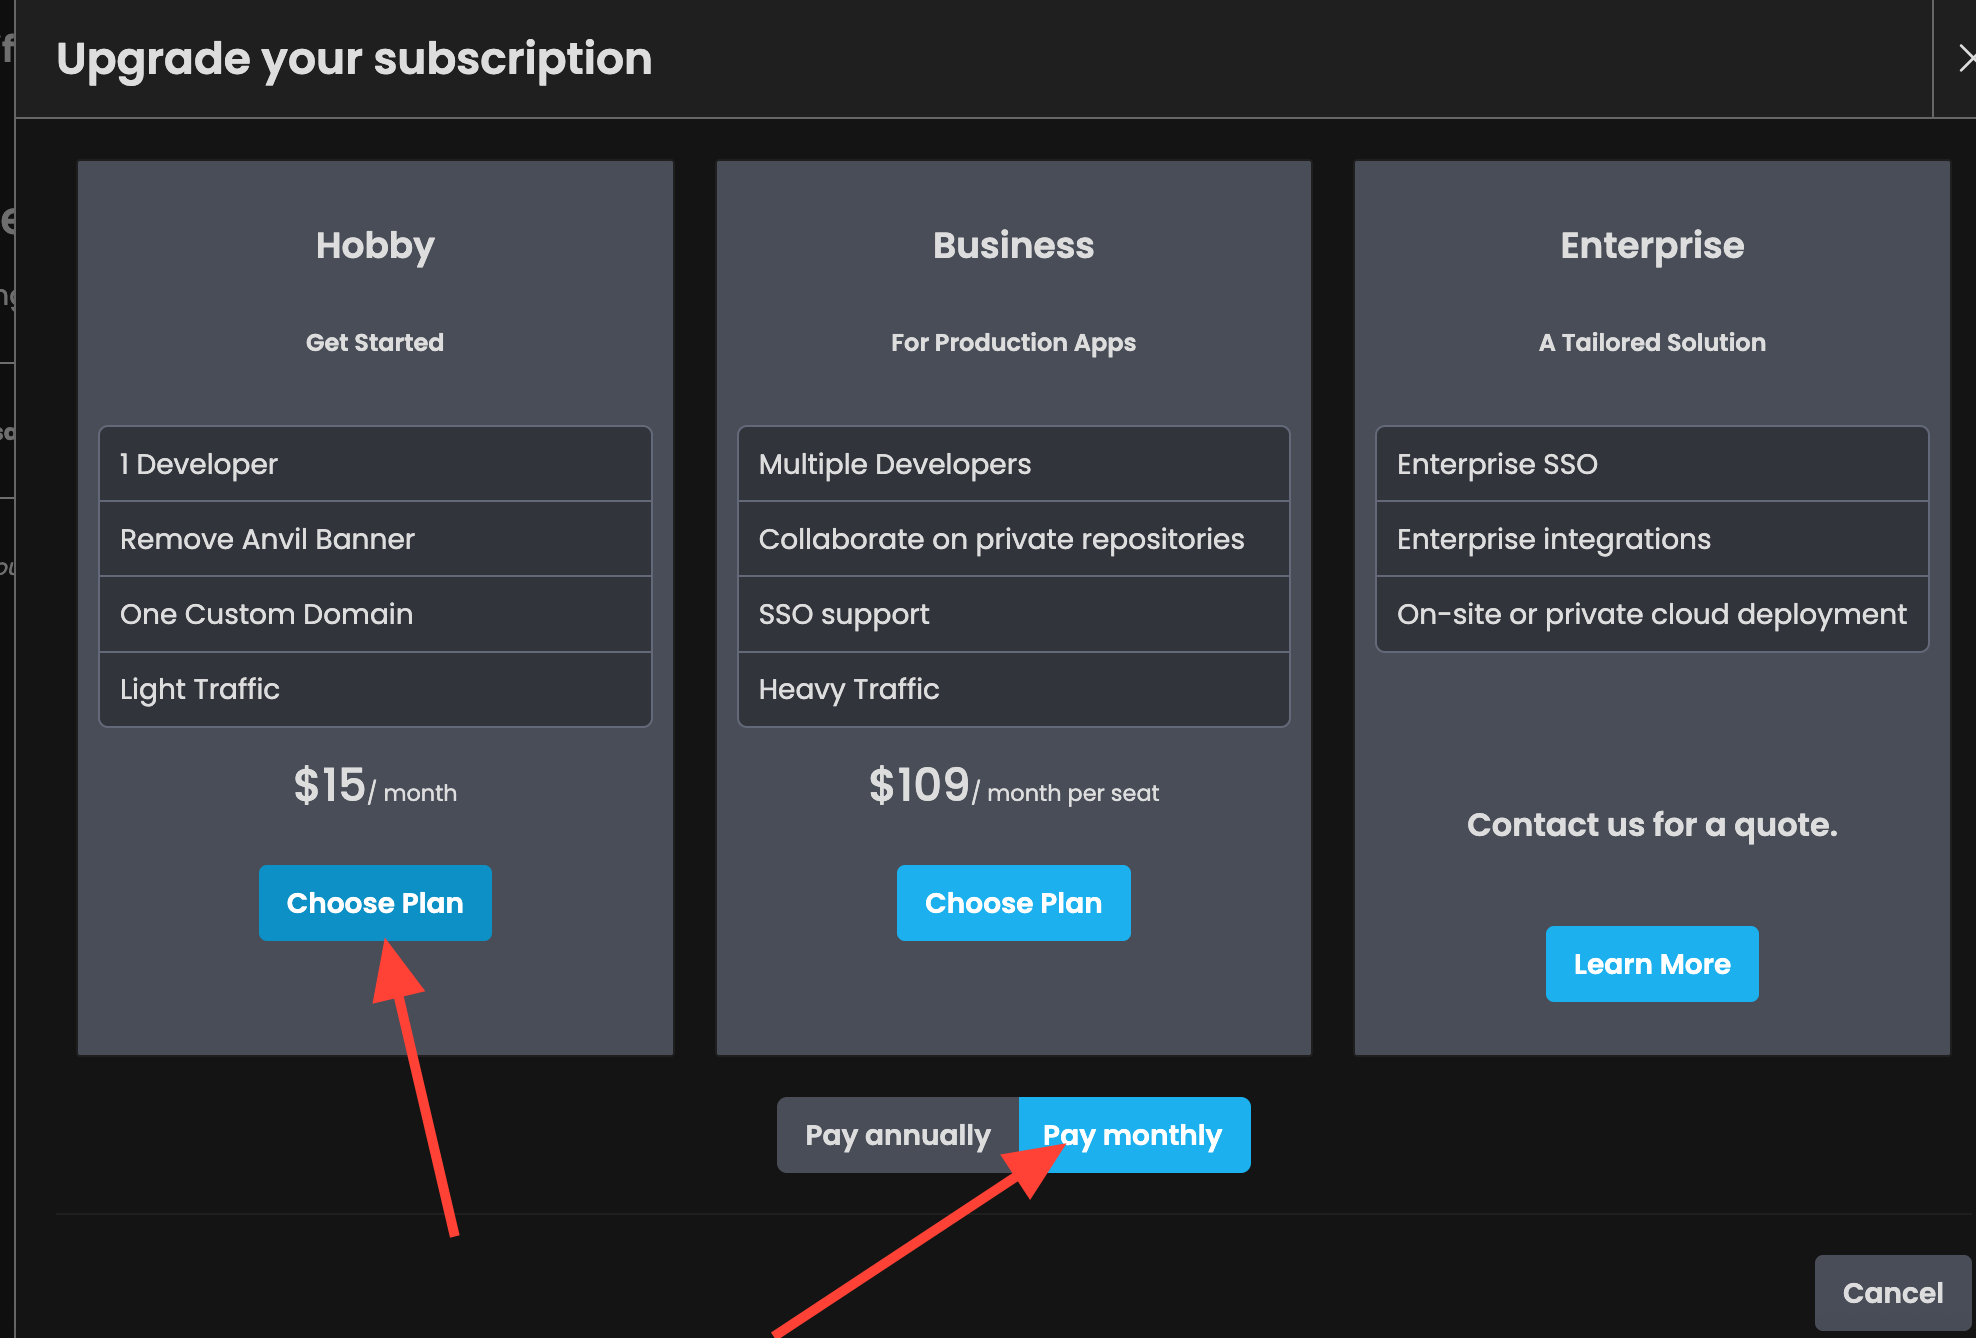
Upgrade Your Anvil Account
You need a paid tier to have background tasks run for more than 30 seconds, which is required by our current configuration. If you’re hesitant to upgrade, you can use a different AI model, limit the number of generated tokens, and stay on the free tier. I’ll provide an alternative script for the Runpod instance later for those who want to continue using Anvil’s free plan, but note that the quality of the completions will be much lower.


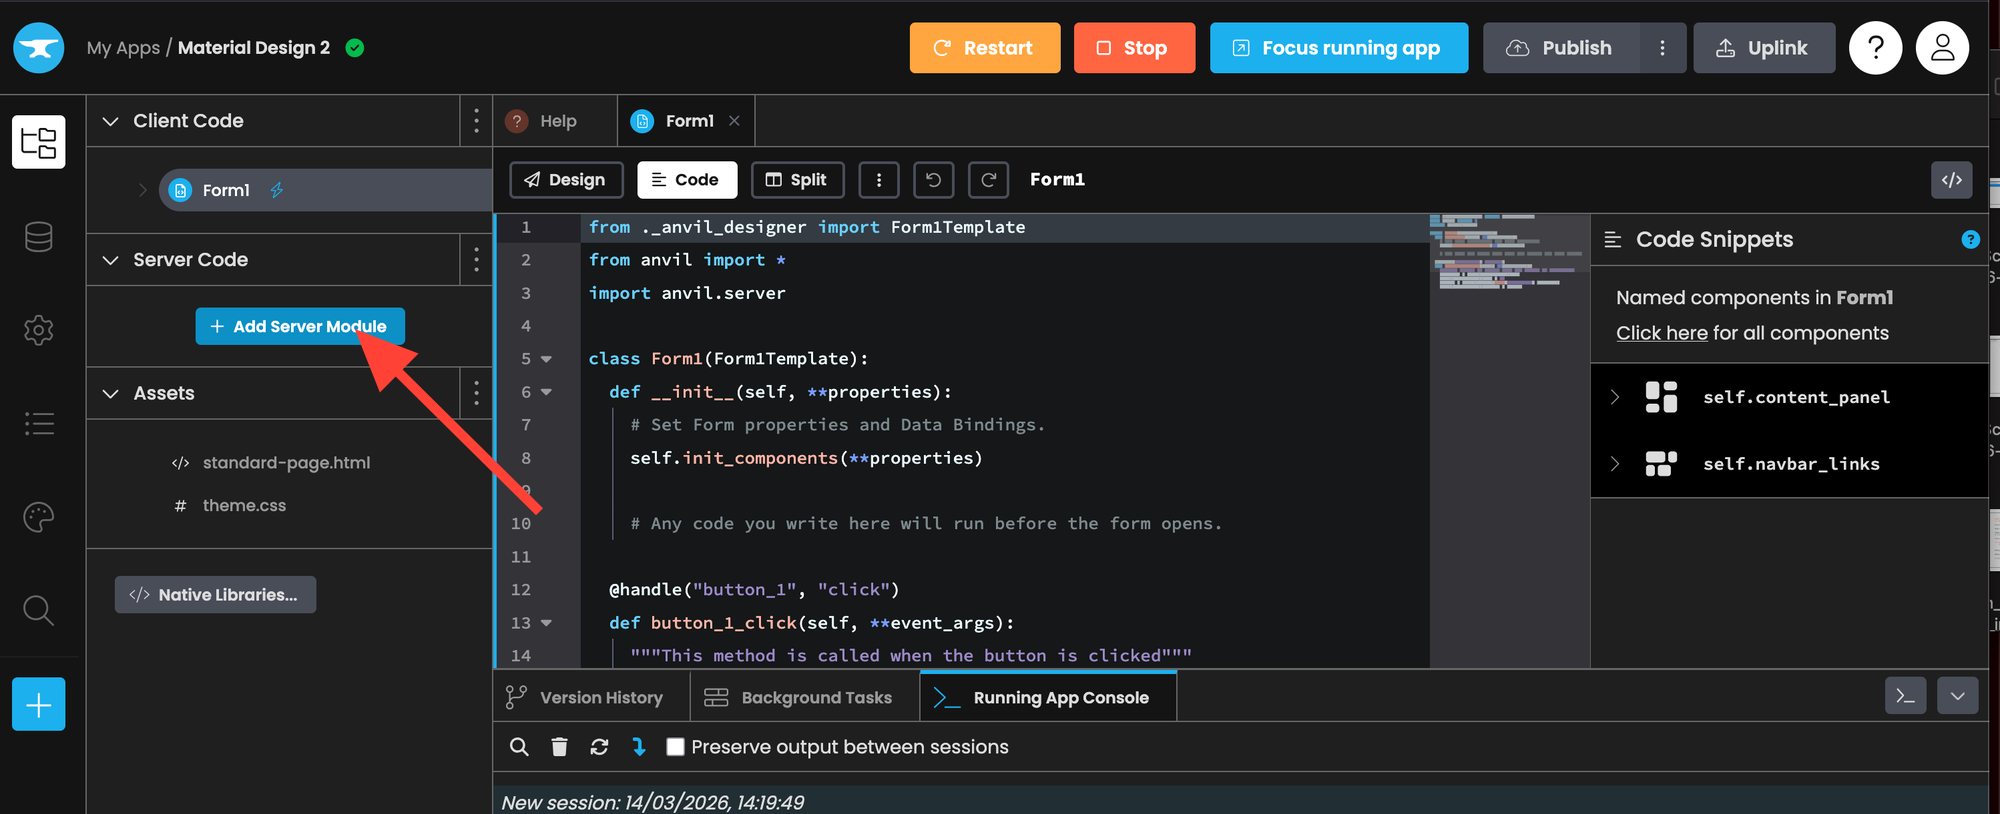
Server Module
Go to the Anvil app and click “+ Add Server Module.”
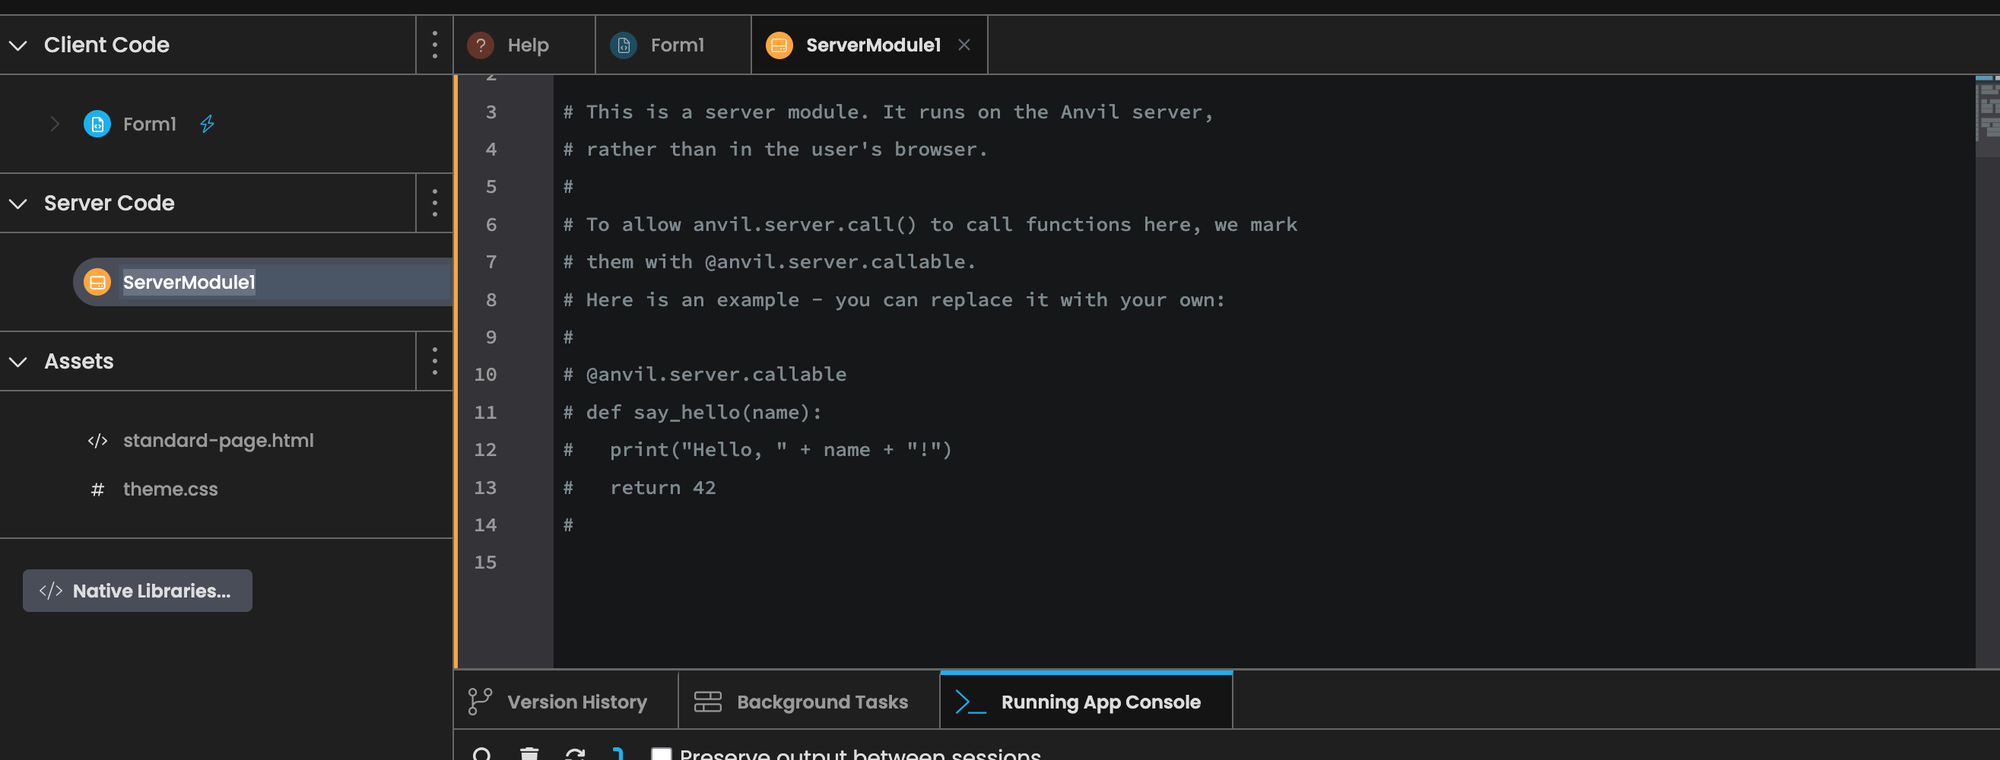
Replace the code in ServerModule1 with the following code.
import anvil.server

@anvil.server.background_task
def call_generate_background(user_text):
  result = anvil.server.call("generate", user_text)
  return result

@anvil.server.callable
def server_generate(user_text):
  result = anvil.server.launch_background_task('call_generate_background', user_text)
  return result
Async Client Code
Go back to the UI builder ( by clicking Form1 and then design) and then drag the timer component into your content panel.
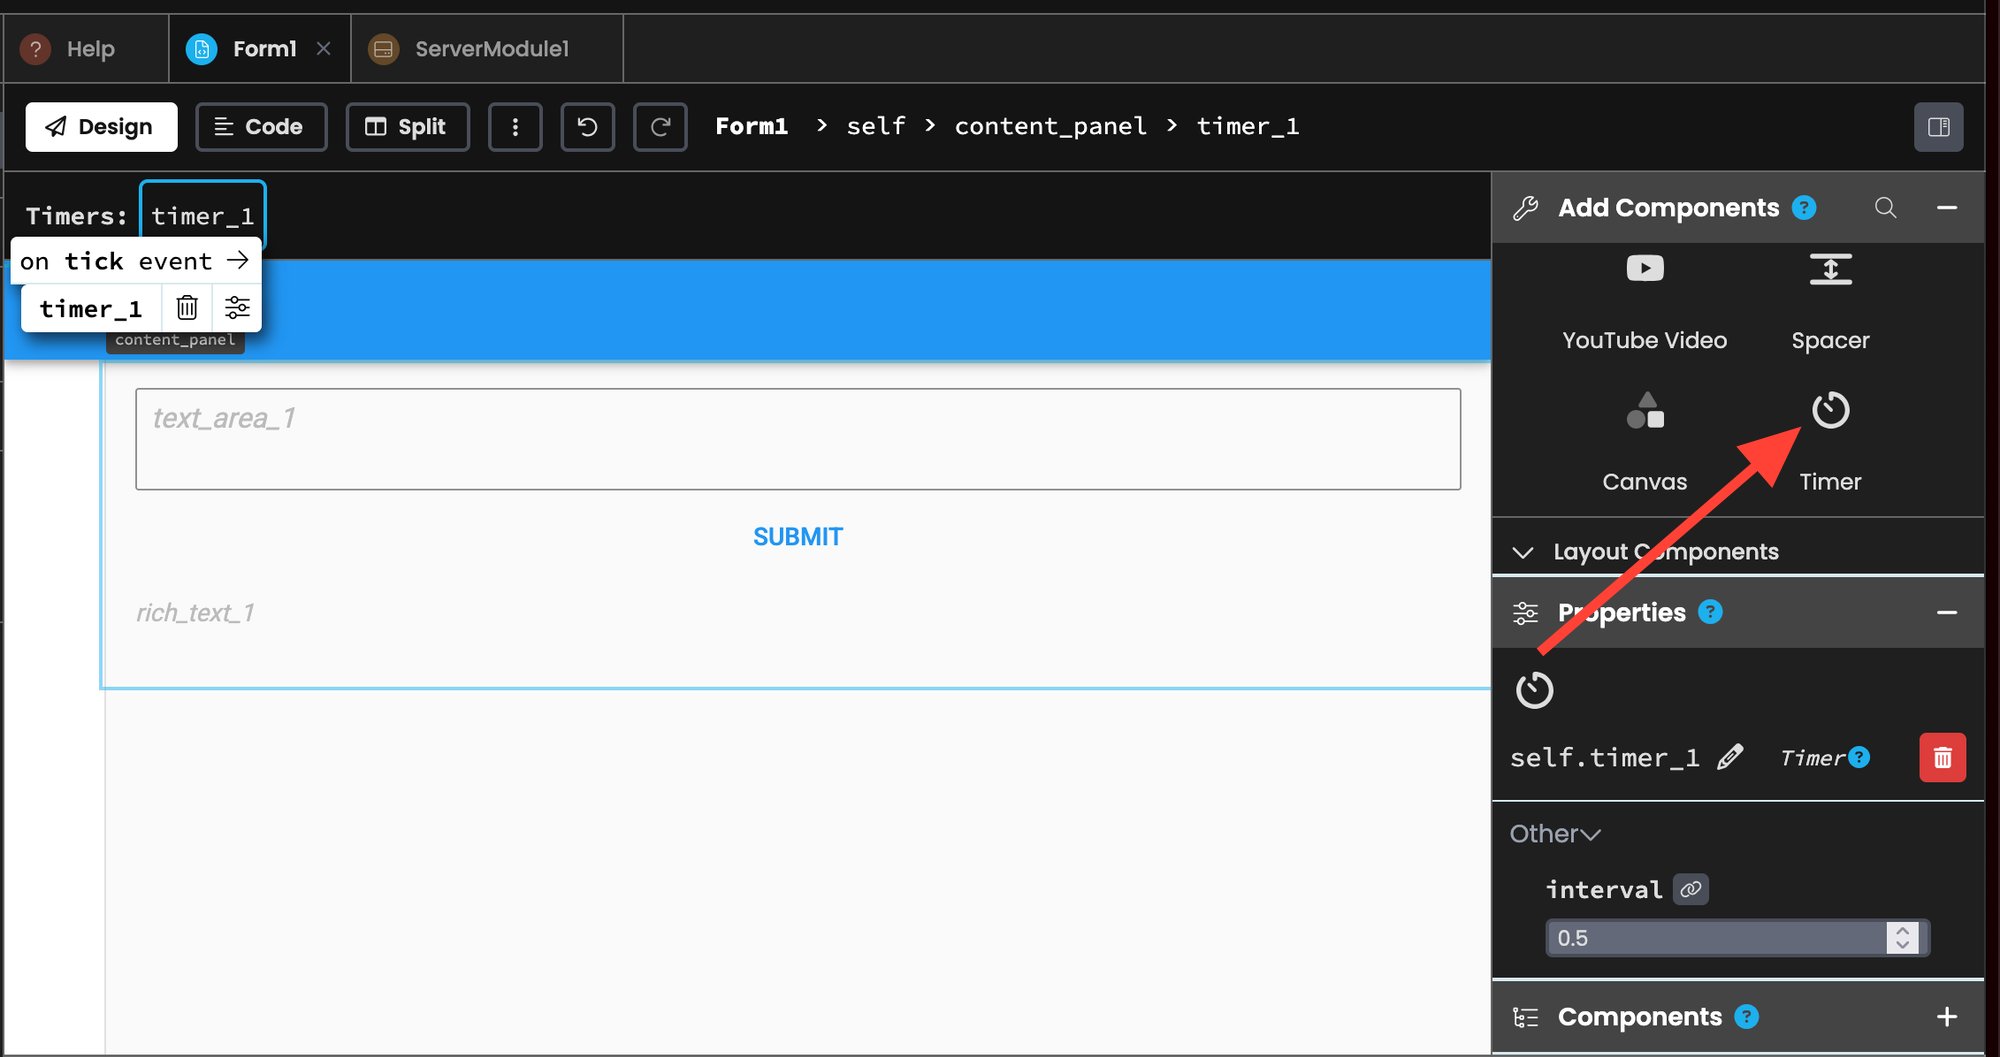
Click on the timer and scroll down until it says "tick" and click the blue arrow.

This will create a new method that runs every 0.5 seconds. You can adjust its frequency by changing the "interval" property, but 0.5 seconds works well for our purposes.
Replace the front-end logic code with the code below.
from ._anvil_designer import Form1Template
from anvil import *
import anvil.server
class Form1(Form1Template):
def __init__(self, **properties):
self.init_components(**properties)
self.async_gen = None
@handle("button_1", "click")
def button_1_click(self, **event_args):
user_text = self.text_area_1.text
self.text_area_1.text = ""
self.async_gen = anvil.server.call("server_generate", user_text)
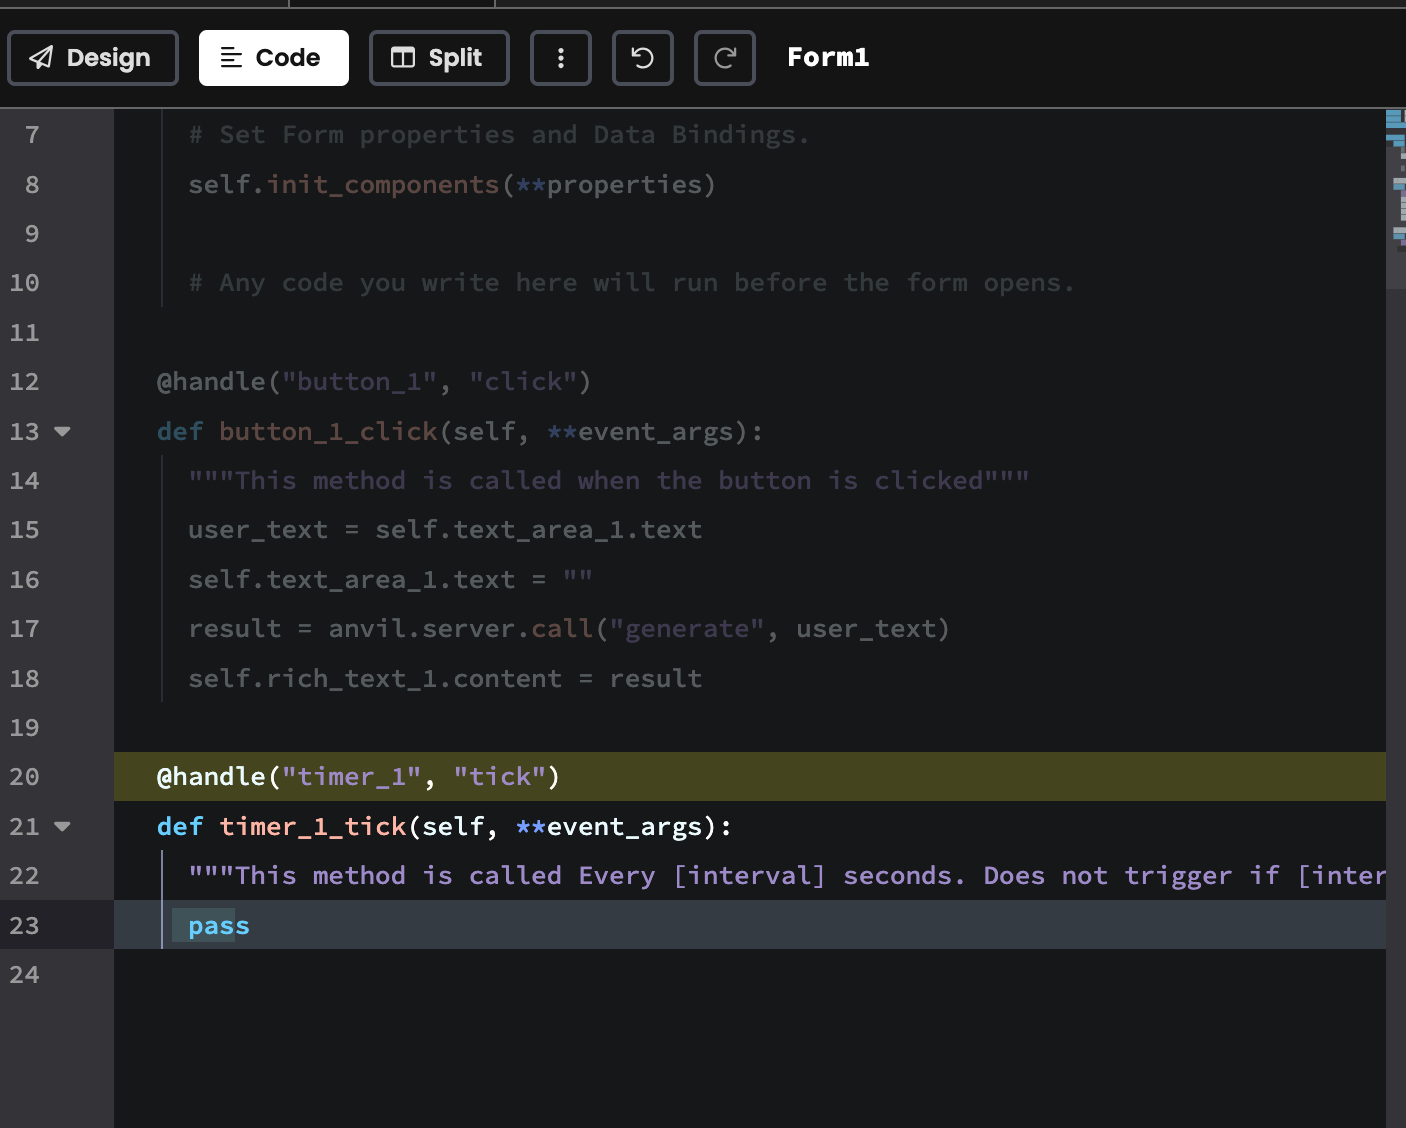
@handle("timer_1", "tick")
def timer_1_tick(self, **event_args):
if self.async_gen is not None and self.async_gen.is_completed():
self.rich_text_1.content = self.async_gen.get_return_value()
self.async_gen = None
self.async_gen is an async object that we check every 0.5 seconds to see if text has been generated.
self.async_gen = None

# ...

self.async_gen = anvil.server.call("server_generate", user_text)
Each time the timer_1_tick runs (every 0.5 seconds) we check if self.async_gen is not None and is completed. We set the rich box contents to the return value. Finally, we reset the state by setting self.async_gen back to None
@handle("timer_1", "tick")
def timer_1_tick(self, **event_args):
if self.async_gen is not None and self.async_gen.is_completed():
self.rich_text_1.content = self.async_gen.get_return_value()
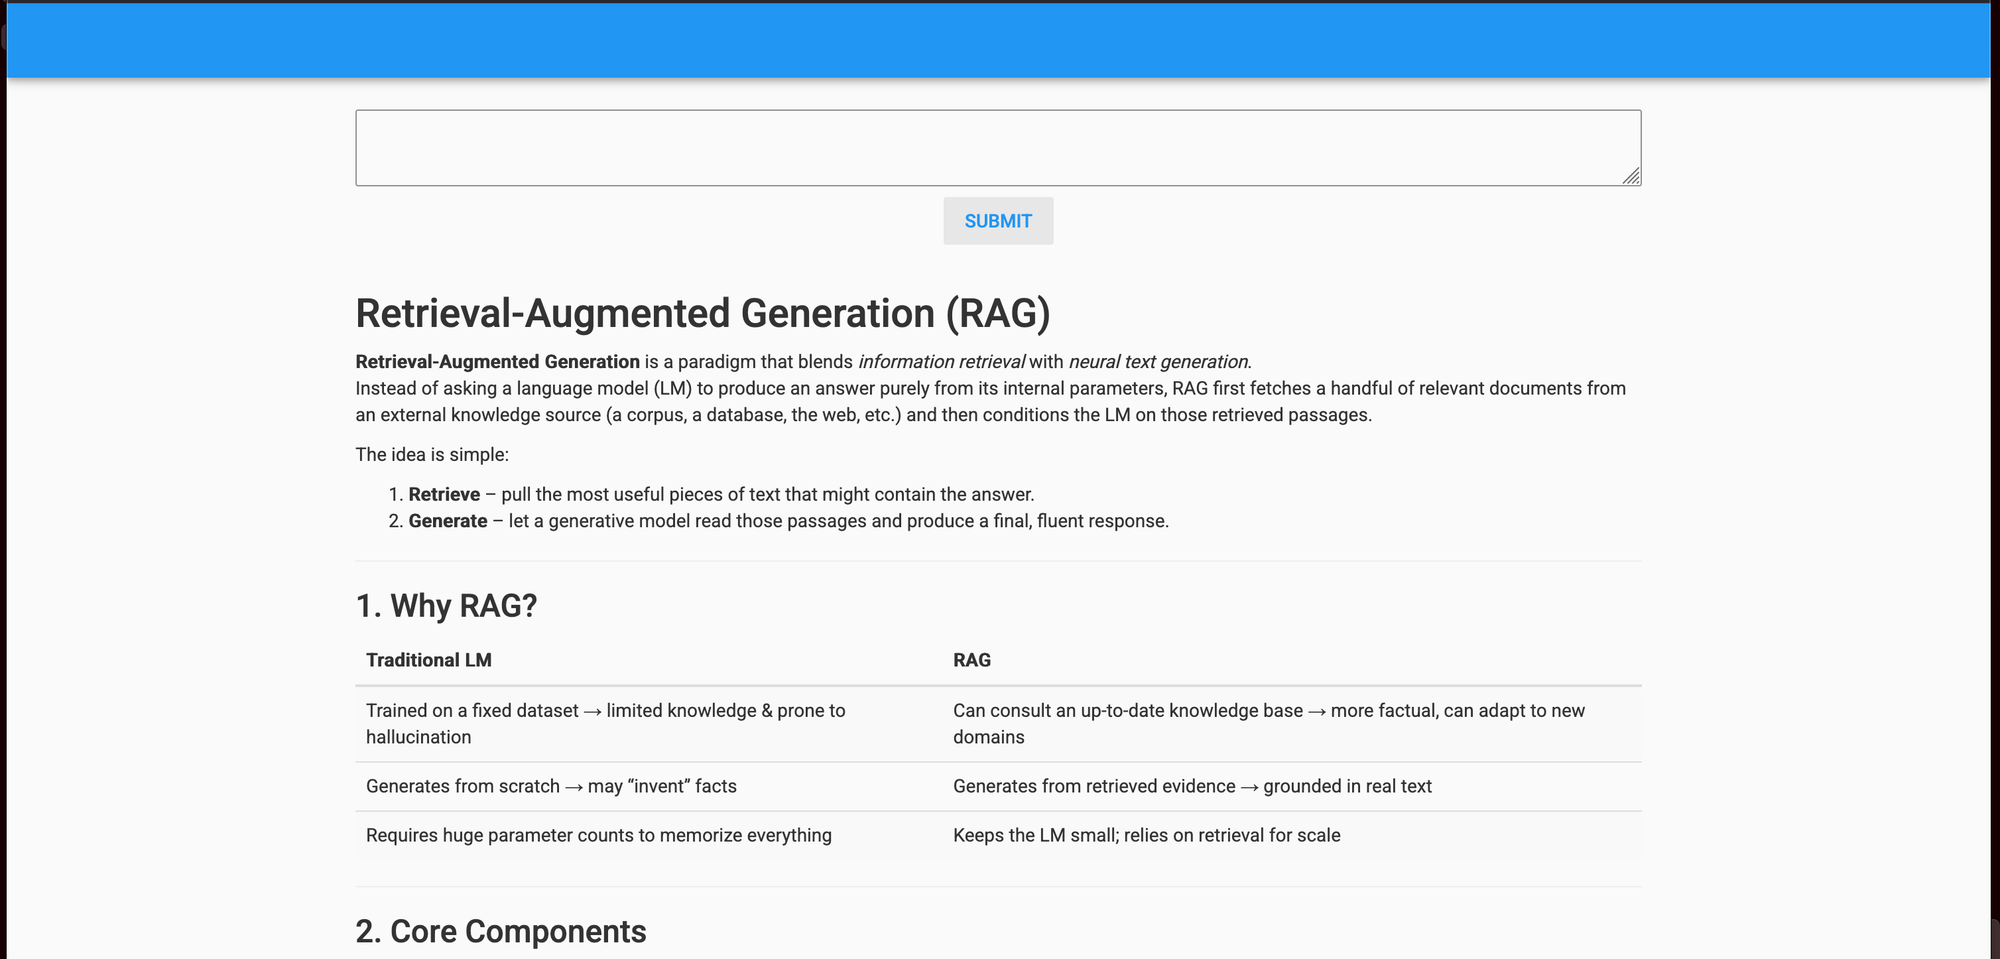
self.async_gen = None Let's restart the app again to test the new code! We asked it "Explain retrieval augmented generation. "
Free Tier Anvil Alternative
As mentioned, there's a 30 second time limit for background tasks on Anvil's free tier. This isn't enough for running a 20-billion parameter models with our current configuration. But, if you would like to continue to use Anvil's free tier, you can consider using EricGeneration instead of EricChat instead for the Runpod script and use a smaller model, like EleutherAI/gpt-j-6b.
import os
import anvil.server
from erictransformer import EricGeneration, GENCallArgs

eric_gen = EricGeneration("EleutherAI/gpt-j-6b")

args = GENCallArgs(temp=0.8, top_k=32, top_p=0.6, max_len=512)

test_generation = eric_gen("Say hello and nothing more", args=args)

print("TEST:", test_generation.text)

@anvil.server.callable
def generate(user_text: str):
    print("INCOMING REQUEST: ", user_text)
    result = eric_gen(user_text, args=args)
    print("RESULT: ", result.text)

    return result.text

anvil.server.connect(os.getenv("KEY"))

anvil.server.wait_forever()
Customize Your AI Web App
Now that the core functionality of the app is working, we suggest you get creative and think of a unique way to customize it! For inspiration, here are two articles I wrote on performing RAG and fine‑tuning gpt‑oss‑2ob.
Open-Source Vector Search and RAG Made Easy With Python
gpt-oss-20b Made Easy. Full-Parameter Fine-Tuning on a Single GPU
There are also lots of other improvements you can make that focus on enhancing what we have now. For example, you can display the user’s chat history and support multi‑turn conversational chats. Anvil lets you build fully‑featured web apps, so you can also explore its authentication functionality, Stripe integration, or its database for more inspiration.
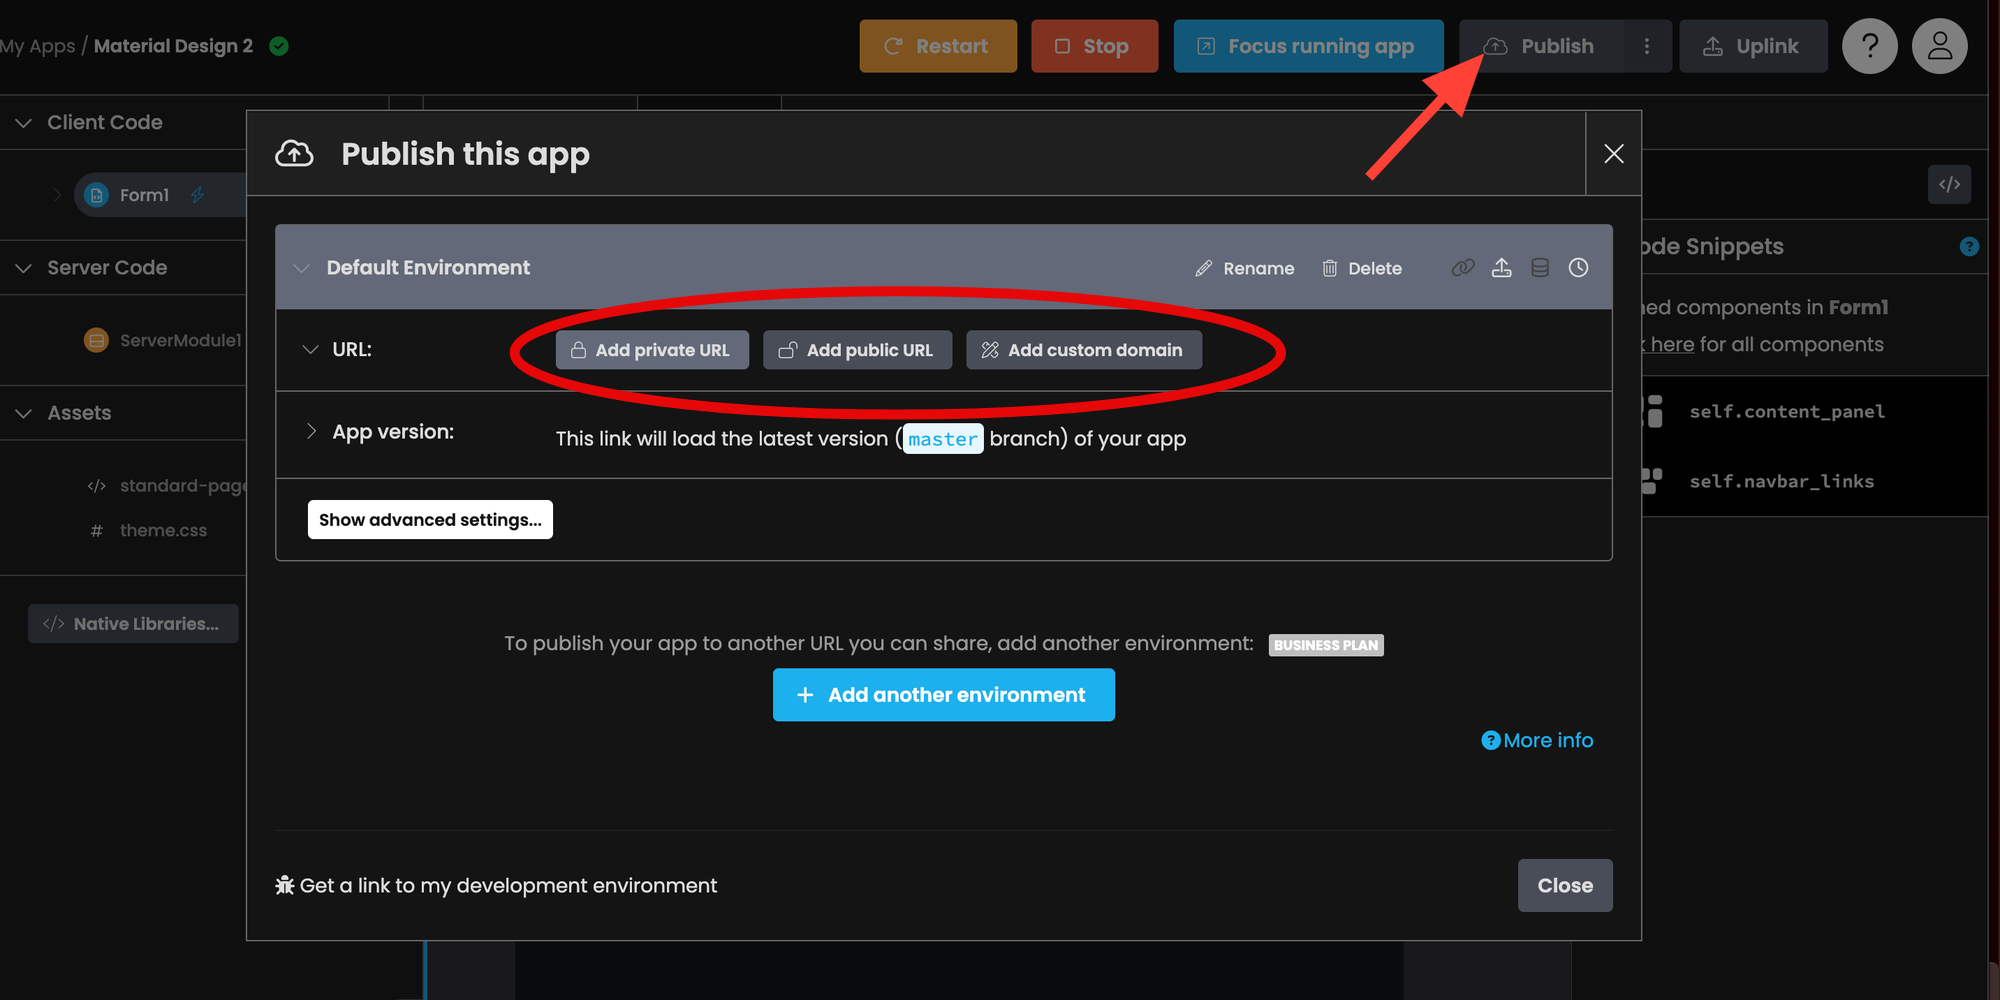
Publish Your Anvil App
The last step is to publish your web app! To do so, click Publish and select one of the options.
Links
Give Eric Transformer a ⭐ to show your support.
Runpod Affiliate Link: Get between a one-time $5 to $500 credit after you add $10 for the first time.